
Most e-bike tires should be set from the tire sidewall range first, then adjusted for rider weight, bike weight, tire width, tubes or tubeless setup, and surface. Heavier e-bikes usually need a little more pressure than the same tire on a light bike, but the safest number is still inside the tire and rim limits printed by the manufacturer.
Start With The Tire, Not A Universal PSI Number
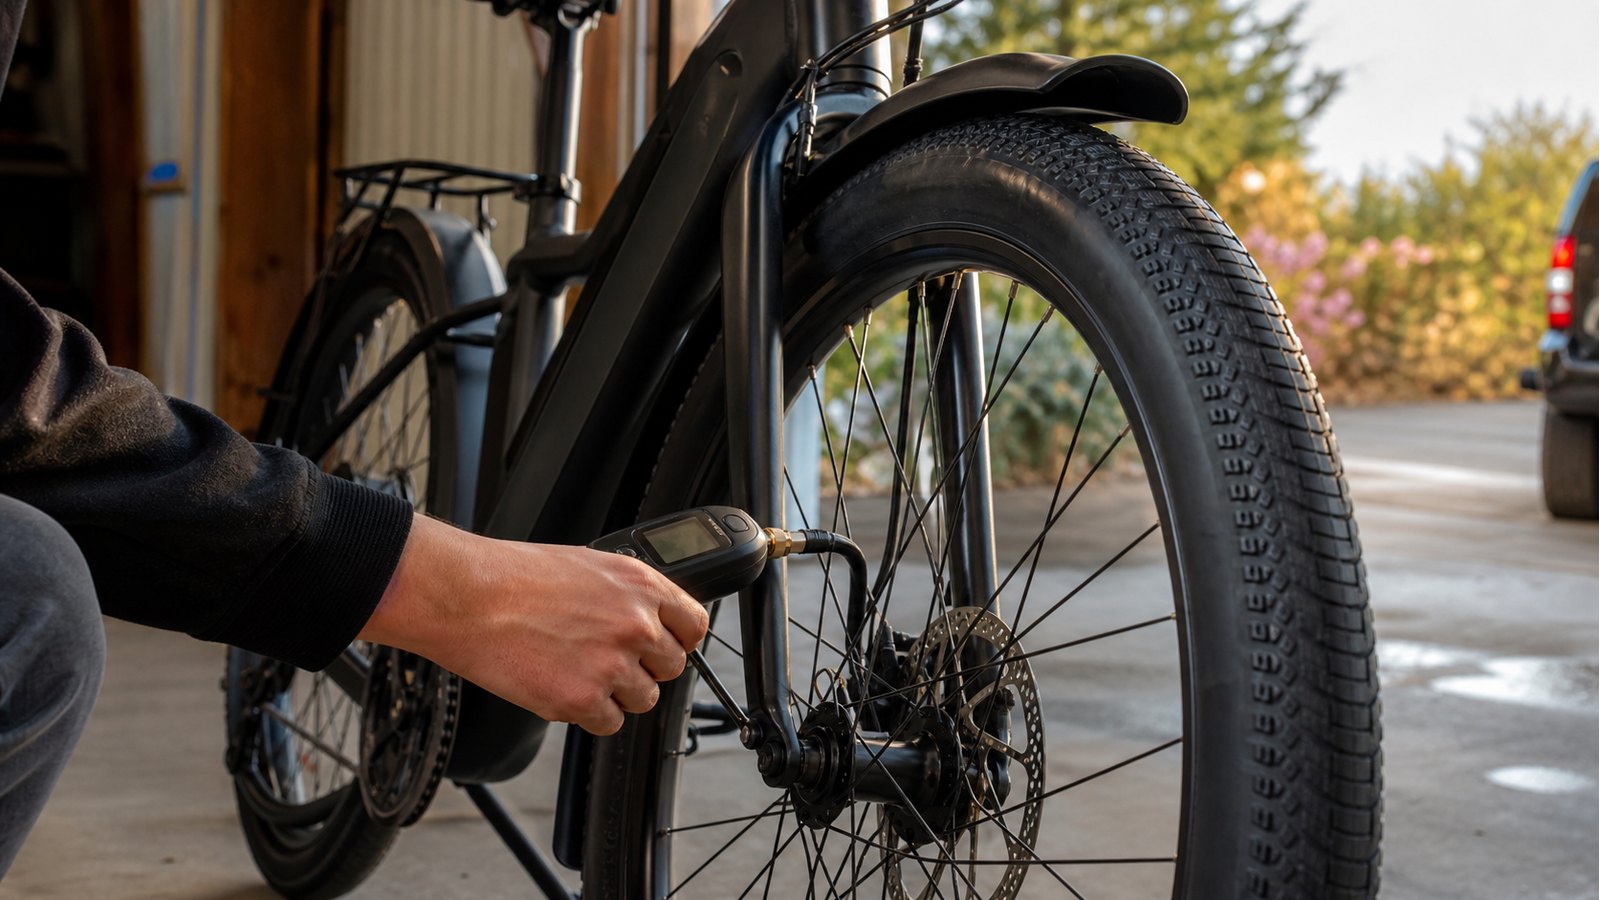
The right e-bike tire pressure starts with the pressure range molded into the tire sidewall. That range is the guardrail. A heavy rider, rear rack, child seat, or loaded pannier pushes you toward the higher end. A wider tire, tubeless setup, snow, gravel, or rough pavement usually lets you move lower inside the allowed range. Tire makers such as Schwalbe also stress that pressure changes with tire width, load, and riding conditions.
| E-bike tire type | Common starting range | Adjust upward when | Adjust downward when |
|---|---|---|---|
| 700×35-40 commuter | 45-70 psi | Heavy rider, rear cargo, smooth pavement | Rough streets, wet roads, comfort issues |
| 27.5×2.0-2.4 urban/trekking | 25-45 psi | Heavy e-bike, tubes, pavement | Gravel, mixed paths, tubeless |
| 26×4.0 fat e-bike | 8-20 psi | Pavement, heavy loads, squirming tire | Snow, sand, loose trail |
| 20×3.0-4.0 folding/fat e-bike | 15-30 psi | Cargo loads, pavement, high speed | Broken pavement, light trail use |
Use this as a starting chart, not a replacement for the tire sidewall. If the sidewall says a narrower range, the sidewall wins.
Why E-Bikes Need A Different Pressure Check
An e-bike often weighs 20-40 pounds more than a similar non-electric bike before cargo is added. More weight compresses the tire, especially at the rear wheel. If pressure is too low, the tire can squirm, pinch flat, wear quickly, or feel vague under braking. If it is too high, the ride gets harsh and grip drops on broken pavement.
The practical move is to set the rear tire slightly higher than the front when the bike carries the battery, motor, rider, and cargo over the rear wheel. A difference of 2-5 psi on medium-width commuter tires or 1-2 psi on fat tires is often enough.
A Simple E-Bike Pressure Method
Set pressure in four steps. First, read the tire sidewall and rim guidance. Second, pick the middle of the allowed tire range. Third, add pressure if the bike is loaded, the tire feels vague, or the sidewall bulges heavily while seated. Fourth, reduce pressure if the ride is harsh and you are still safely inside the allowed range.
Do the test with the bike loaded the way you actually ride. A pressure that feels fine on an empty e-bike can be too soft after adding groceries, a lock, and panniers.
Tubes, Tubeless, And Flat Risk
Tubes usually need more conservative pressure because pinch flats happen when the tube is trapped between rim and tire during an impact. Tubeless setups can often run lower, but only when the tire, rim, sealant, and valve are compatible. Do not drop pressure just because the bike is electric; drop it because the tire system supports it.
If your tire keeps losing air, use Icebike’s guide to bike tire pressure loss before assuming the e-bike needs a different PSI.
Wet Weather, Winter, And Rough Roads
For wet pavement, do not simply deflate the tire until it feels soft. Lower pressure can help comfort and contact patch, but too little pressure makes steering sloppy and increases flat risk. In winter, pressure can drop as temperature falls, so check with a gauge indoors and again after the bike has been outside for a while.
If you ride in cold weather, compare this guide with Icebike’s winter bike tire pressure calculator.
E-Bike Tire Pressure Mistakes
The biggest mistake is copying a road-bike pressure chart onto a heavy commuter e-bike. The second is inflating to the maximum sidewall number every time. Maximum pressure is not the same thing as best pressure. It is a limit. The third mistake is ignoring cargo. A loaded rear rack can change the feel of the bike more than a small tire-width difference.
Where To Go Next
Use the bike tire pressure calculator for a broader starting point, then adjust for e-bike weight and cargo. If tire sizing is confusing, use the bike tire size chart before buying a replacement tire.
How To Use These Numbers Without Guessing
The useful e-bike pressure process is a repeatable field test. Pick the closest table value, ride the bike with its normal battery, lock, bags, and cargo, then adjust in small steps. A narrow commuter tire can change by 2-3 psi at a time. A fat e-bike tire may only need 1 psi changes. Write down the front and rear number once the bike feels stable.

| Test question | Good result | Change if it fails |
|---|---|---|
| Does the rear tire squat heavily when seated? | Slight flattening only | Add rear pressure in small steps |
| Can you corner without tire fold or vague steering? | Bike tracks cleanly | Add pressure, especially rear |
| Do hands and shoulders feel beaten up after rough pavement? | Firm but not jarring | Lower front first, then rear |
| Do you hear rim hits over potholes? | No hard rim contact | Add pressure or avoid the route |
| Does the tire stay inside sidewall limits? | Always inside printed range | Stop and choose a different tire if not |
This table is the inline graphic that most e-bike pressure pages are missing: it connects the number to what the rider feels. The article should not leave a reader with a PSI value and no way to judge whether it works.
Cargo, Child Seats, And Rear-Heavy E-Bikes
Cargo changes e-bike pressure more than motor power does. A rear basket, panniers, child seat, delivery bag, or heavy chain lock can move the rear tire from comfortable to underinflated even when the gauge number looked fine before loading the bike. The fix is not to max out both tires. Keep the front predictable and raise the rear enough to support the load.
| Added load | Pressure move | Safety check before traffic |
|---|---|---|
| Heavy lock or small bag | Rear +2 psi on narrow tires, +1 psi on fat tires | Brake and corner once in a quiet area |
| Two loaded panniers | Rear +3-6 psi, front usually unchanged | Check heel clearance and bag security |
| Child seat | Rear pressure near upper half of safe range | Test stopping distance with child weight |
| Trailer | Tire pressure on bike plus trailer tires | Check hitch, flags, lights, and turning room |
| Delivery load | Recheck every work shift | Inspect rear tire casing more often |
If the rear wheel feels heavy when you stand to pedal, the tire may still be low for the load. If the ride becomes harsh and traction gets worse, you went too far. The right answer is usually a stable rear tire and a front tire that still lets the bike steer calmly.
E-Bike Tire Pressure For Winter And Bad Pavement
Cold weather and rough pavement make pressure more important because traction, comfort, and flat protection start competing. Do not treat winter as permission to run any tire soft. Instead, use the tire’s printed range, then make smaller adjustments than you would in warm weather. Cold air can also reduce pressure after the bike sits outside, so check with a gauge before blaming the tire.
For winter commuting, use a wider tire or winter tire when the route allows it. On compact snow, a small pressure reduction can help the contact patch. On wet ice, pressure is not the real solution; studs, route choice, and speed matter more. If the weather is severe enough that the bike cannot stop predictably, skip the ride or change the route.
| Surface | Pressure direction | Main risk |
|---|---|---|
| Smooth dry pavement | Middle to upper safe range | Harsh ride if too high |
| Broken city pavement | Middle of range | Pinch flats if too low |
| Wet pavement | Slightly lower only if stable | Slipping on paint, leaves, metal |
| Packed snow | Lower within safe range | Tire roll or vague steering |
| Ice | Pressure is secondary | Need studs, caution, or no ride |
Use Icebike’s winter bike tire pressure calculator when the surface is snow or cold-weather commuting, and the bike tire size chart if your current tire is too narrow for the route.
Maintenance Schedule For E-Bike Tires
E-bikes hide low tire pressure because the motor masks drag. That is why a weekly pressure routine matters. A tire that is only a little low can reduce range, wear the casing, and make the bike feel unstable under cargo. Schwalbe notes that pressure should be checked and adjusted at least monthly, but daily e-bike commuters should check more often because weight and mileage are higher.
| Rider pattern | Pressure check | Inspection check |
|---|---|---|
| Occasional weekend rides | Before every ride | Sidewalls and tread before storage |
| Daily commuter | Weekly, plus after hard impacts | Cuts, embedded glass, valve angle |
| Cargo or child seat rider | Twice weekly | Rear tire wear and bead seating |
| Winter rider | Before cold rides | Studs/tread, cracks, rim tape |
| Tubeless rider | Weekly gauge check | Sealant level and valve core |
Keep a small note in your phone with the front and rear pressure that worked. When the tire, season, load, or route changes, retest instead of copying the old number.
When To Ignore Generic E-Bike PSI Advice
Ignore any advice that gives one pressure for every e-bike, tells you to use the sidewall maximum by default, or does not ask about tire width and load. A 700×38 commuter tire, a 20×4 folding e-bike tire, and a 26×4 snow tire are different tools. The same rider may need three different pressure habits across those bikes.
Use generic advice only as a first guess. The final number should survive a loaded test ride, a braking check, and a quick inspection for tire fold or rim hits. That is especially important on rental-style city e-bikes, cargo e-bikes, and fat-tire e-bikes, where the bike can feel stable at low speed but vague once traffic, speed, or cargo enters the ride.