Cycling in the rain is safe enough for many riders when visibility is good, braking room is generous, tires are in good condition, and traffic conditions are not chaotic. The danger rises quickly with darkness, standing water, painted lines, metal covers, leaf sludge, high wind, and drivers who cannot see you clearly.
Decide Whether The Ride Is Worth It
Rain riding is a judgment call, not a toughness test. Light rain on a familiar route can be manageable. Heavy rain, lightning, flooding, poor visibility, or cold wind can turn a normal commute into a bad decision. If the route forces you into fast traffic with no shoulder or bike lane, waiting is often the smarter move.
| Condition | Ride decision |
|---|---|
| Light rain, daylight, familiar route | Usually manageable with lights and slower braking |
| Heavy rain or spray from traffic | Avoid unless the route is protected and necessary |
| Thunderstorms or flooding | Do not ride |
| Near-freezing rain | Treat as ice risk and skip the ride |
| Dark plus rain | Ride only with strong lights, reflective gear, and a safe route |
Brake Earlier Than Usual
Wet rims, rotors, pads, and roads reduce braking confidence. Start braking sooner and use both brakes smoothly. Avoid sudden steering while braking hard. Disc brakes usually handle rain better than rim brakes, but even disc brakes need extra stopping distance when the road is slick.
Painted lane markings, metal utility covers, wet leaves, wooden bridges, and oil patches are the classic trouble spots. Keep the bike more upright over them and avoid hard braking until you are back on clean pavement.
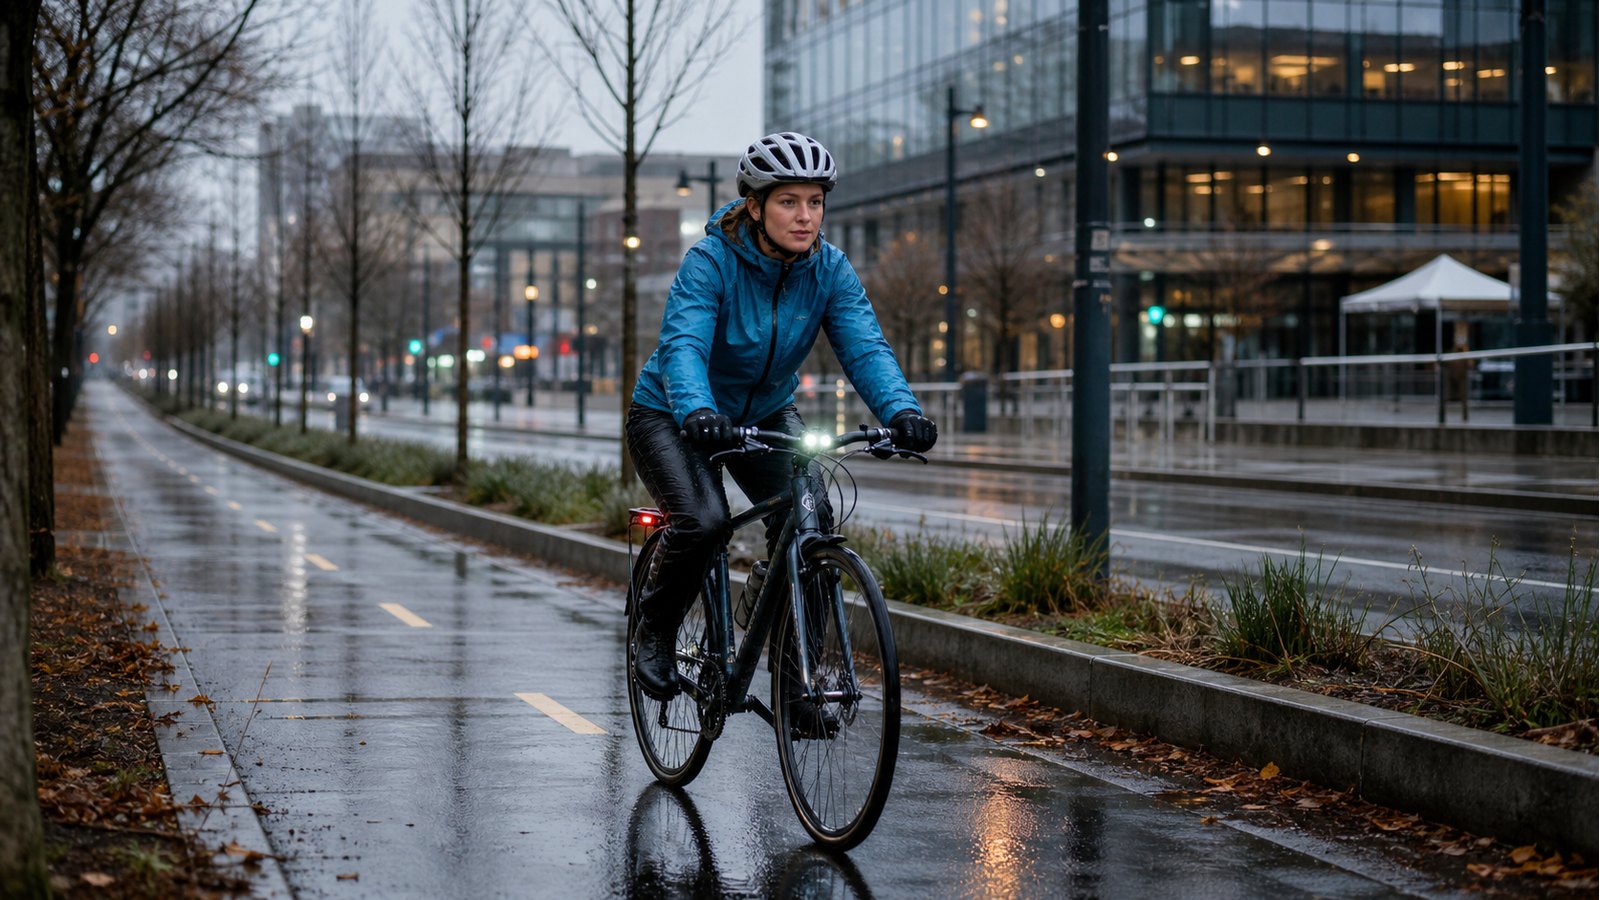
Make Yourself Easier To See
Rain makes cyclists harder to notice because windshields, mirrors, and side windows collect water and glare. Use a white front light and red rear light even during the day. Reflective ankle bands, shoe details, or pedal reflectors help because moving reflectors catch attention better than a static stripe.
The National Highway Traffic Safety Administration recommends predictable riding and visibility. In rain, that means signaling early, taking a clear lane position, and avoiding last-second swerves around puddles.
Keep Water Out Of The Wrong Places
Full fenders are the best comfort upgrade for a rain commuter. They keep road spray off your face, drivetrain, shoes, and the rider behind you. A waterproof or lined bag matters more than a jacket if you carry a laptop, phone, or work clothes.
After the ride, wipe the chain, dry the bike if it will sit indoors, and relube when the chain sounds dry. If you commute often, Icebike’s bike chain lube guide can help you choose a wet-weather lube without overdoing it.
Tire Pressure And Grip
Do not drop tire pressure randomly just because it is raining. A small reduction can improve comfort and contact patch, but too little pressure increases flat risk and makes the bike feel vague. Start with Icebike’s bike tire pressure calculator and adjust within the tire range.
Good tread condition matters more than chasing a magic rain PSI. Replace worn, cracked, or squared-off tires before using them as daily rain tires.
Rain Ride Checklist
- Lights on, front and rear.
- Brakes checked before entering traffic.
- Tire pressure checked inside the sidewall range.
- Phone, keys, and electronics protected.
- Fenders or rain pants ready for commuting.
- Route chosen to avoid fast traffic, deep puddles, and poor drainage.
For cold rain, use Icebike’s winter cycling gear guide and wind chill chart before riding.
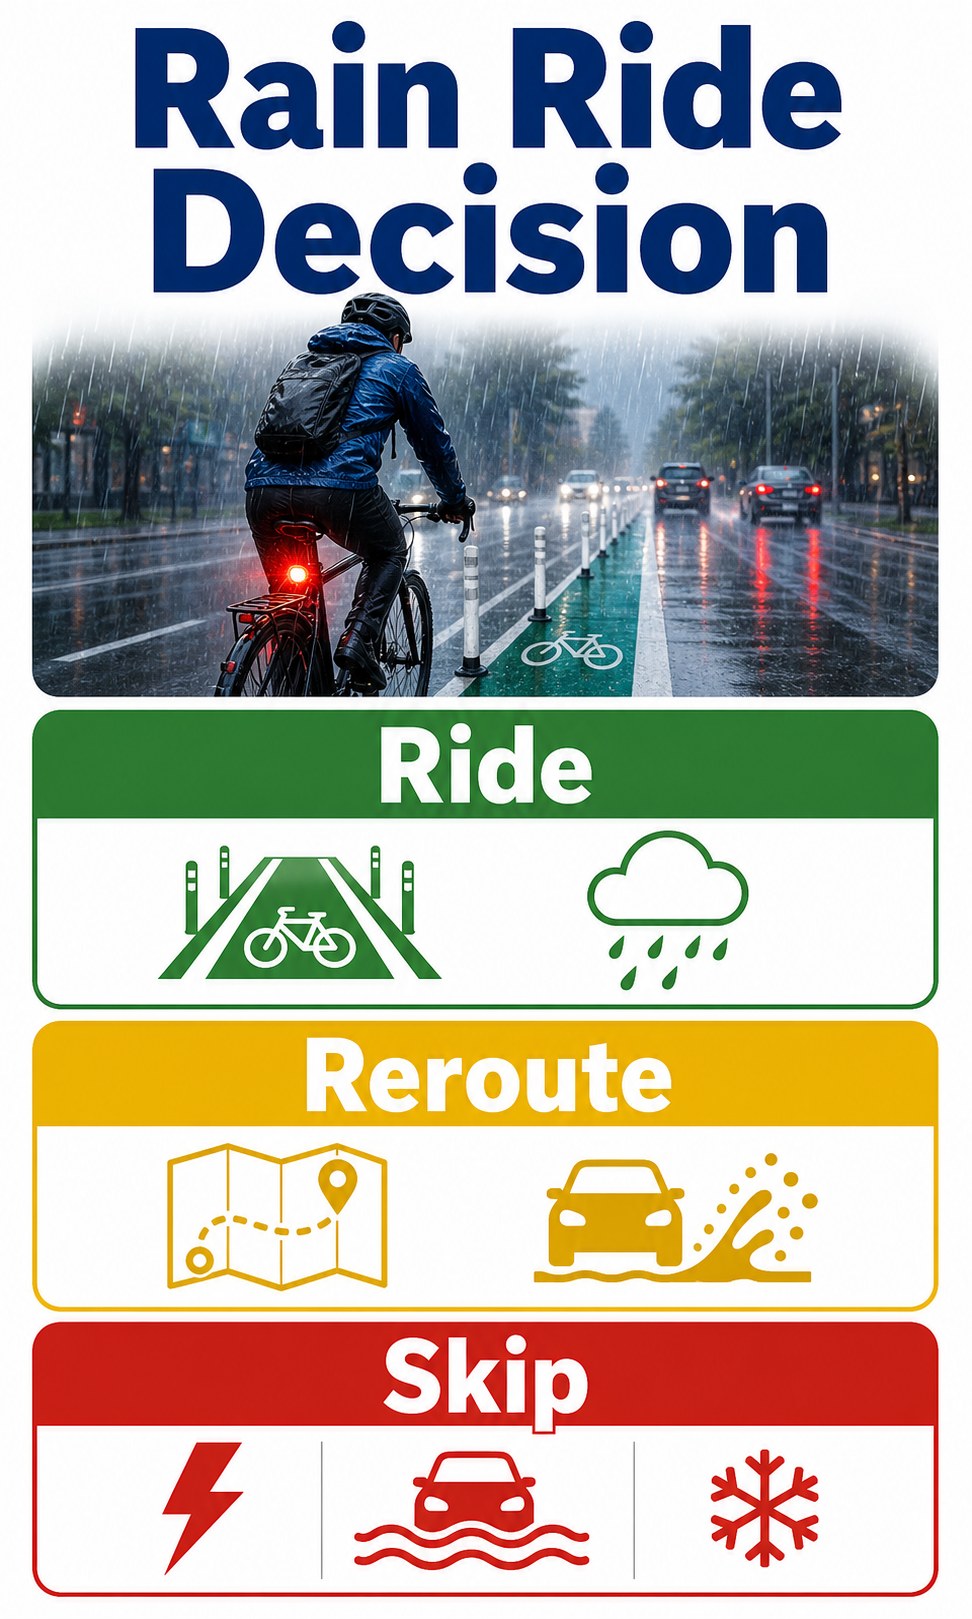
Rain Riding Risk Matrix
A good rain guide should not pretend every rainy ride is the same. Light rain on a protected path is different from cold rain in fast traffic. Use this matrix before deciding whether to ride, change the route, take transit, or wait.
| Risk factor | Low risk | Higher risk | Action |
|---|---|---|---|
| Visibility | Daylight, lights on | Night, glare, fog, spray | Add lights or avoid traffic |
| Temperature | Warm rain | Near-freezing rain | Skip if ice is possible |
| Surface | Clean pavement | leaves, paint, metal, oil | Slow down and stay upright |
| Route | Protected lane or path | Fast traffic, narrow shoulder | Choose another route |
| Brakes | Tested and strong | Weak, rubbing, unknown | Fix before riding |
| Rider state | Calm and alert | Rushed, cold, distracted | Shorten or postpone |
This is the decision graphic missing from many rain-riding tips. The safest rain ride is not the one with the most gear; it is the one with manageable risk.
Braking And Cornering In Wet Weather
Brake earlier than you think you need to, especially on a bike with rim brakes. Rain puts water and grit between the braking surface and pad. Disc brakes usually feel more consistent, but tires still have less grip on wet hazards. Make every major speed change before the turn, then keep the bike upright and smooth through the corner.
| Wet surface | Riding rule | Mistake to avoid |
|---|---|---|
| Painted lane lines | Cross straight and upright | Leaning hard across paint |
| Metal covers | Coast or roll smoothly | Braking while leaned over |
| Leaves | Treat as slick even at low speed | Assuming the pavement underneath is clean |
| Puddles | Avoid if depth is unknown | Hitting hidden potholes |
| Rail tracks | Cross close to perpendicular | Shallow-angle crossing |
If your brakes squeal after rain but still stop well, it may be water and grit. If the lever pulls to the bar, stopping power changes suddenly, or the pad is worn, stop and fix it. Icebike’s bike brakes squeak and tighten bike brakes guides cover the common next checks.
Visibility Setup For Rain
NHTSA emphasizes visibility and predictable riding for bicyclists. In rain, lights should be treated as daytime equipment, not just night equipment. A bright jacket helps, but drivers still need a clear front and rear light through wet glass, reflections, and road spray.
| Item | Minimum | Better setup |
|---|---|---|
| Front light | White, charged, visible ahead | Steady mode in traffic, backup light for commute |
| Rear light | Red, visible from behind | Seatpost plus bag/rack light if cargo blocks one |
| Reflective detail | Pedal, ankle, wheel, or bag reflection | Moving reflectors on both sides |
| Clothing | Bright enough for daylight | Waterproof shell plus reflective trim |
| Lane position | Predictable and visible | Avoid gutter spray and hidden puddles |
Check lights before the ride, not after the rain starts. If your bag or rain jacket blocks a rear light, move the light.
Clothing, Bags, And Fenders
Rain comfort comes from keeping the important parts warm and keeping work or school items dry. For a short warm ride, quick-drying clothes may beat heavy waterproof layers. For a commute, waterproof bags, fenders, gloves, and a dry change of socks matter more than looking fast.
Fenders are one of the highest-value upgrades for rainy transportation cycling. They reduce dirty road spray, protect shoes and drivetrain, and make the ride less miserable for anyone behind you. REI’s rain-riding guidance also points to fenders, lights, chain care, and route tactics as practical rain upgrades.
| Ride type | Useful setup | Skip |
|---|---|---|
| Short errand | Light jacket, lights, fenders if available | Heavy layers that overheat |
| Work commute | Waterproof pannier, spare socks, full fenders | Backpack that soaks documents |
| Cold rain | Warm gloves, dry base layer, wind protection | Cotton layers |
| Group ride | Bright rear light, fenders with flap | Spraying riders behind you |
After-Ride Bike Care
Rain is a maintenance event. It moves grit into the chain, brake pads, rims, rotors, cables, and frame corners. You do not need a full teardown after every ride, but you should remove grit before it becomes wear.
| After the ride | Why it matters |
|---|---|
| Wipe the chain | Grit accelerates drivetrain wear |
| Dry lights and bags | Prevents dead batteries and soaked gear |
| Check brake pads | Wet grit wears pads faster |
| Inspect tires | Rain hides glass and debris |
| Relube lightly when dry | Prevents squeaks and rust |
For cold rain and winter transitions, pair this article with Icebike’s winter cycling gear guide and wind chill chart. If conditions are crossing into ice, this stops being a rain problem and becomes a winter riding problem.
Rain Route Planning
The safest wet-weather route is often not the shortest route. Favor protected lanes, slower streets, clean pavement, and places where drivers have room to pass. Avoid routes with high-speed spray, downhill painted turns, metal bridge decks, underpasses that flood, and leaf-heavy corners. If a route feels stressful in dry weather, rain will usually make it worse.
| Route choice | Rain advantage |
|---|---|
| Protected bike lane | More separation from spray and passing traffic |
| Slower parallel street | More reaction time for riders and drivers |
| Path with good drainage | Fewer puddle surprises |
| Route with transit backup | Easier exit if weather worsens |
| Familiar commute | Known potholes, drains, and traffic patterns |
Test a rainy commute on a low-pressure day before relying on it for work. That single practice ride reveals puddles, glare, clothing problems, and bag leaks without the pressure of being late.
When Rain Becomes A No-Ride Condition
Rain is not automatically dangerous, but some combinations should stop the ride. Lightning, flooded roads, near-freezing rain, high wind, and visibility so poor that drivers cannot see a lit rider are no-ride conditions for most people. The same is true if the bike has weak brakes, badly worn tires, or lights that fail during the pre-ride check.
This matters because many rain articles are too cheerful about riding through anything. Icebike’s better answer is practical: ride in manageable rain, change the route when risk rises, and skip the ride when stopping, visibility, or surface grip become uncertain.