What to wear on your feet is a big question and the source of much discussion among icebikers. There are basically two schools of thought on the subject.
- Use shoes designed for cycling, making additions or changes to accommodate the cold, such as adding neoprene booties over the shoes or Gore-Tex socks to retain the warmth or keep the water out.
- Give up on cycling shoes and go to lightweight boots, winter boots, or hiking boots to gain a degree of waterproofing and warmth not available in bike equipment.
Your choice depends on your climate, bike, and just how “cool” you must be.
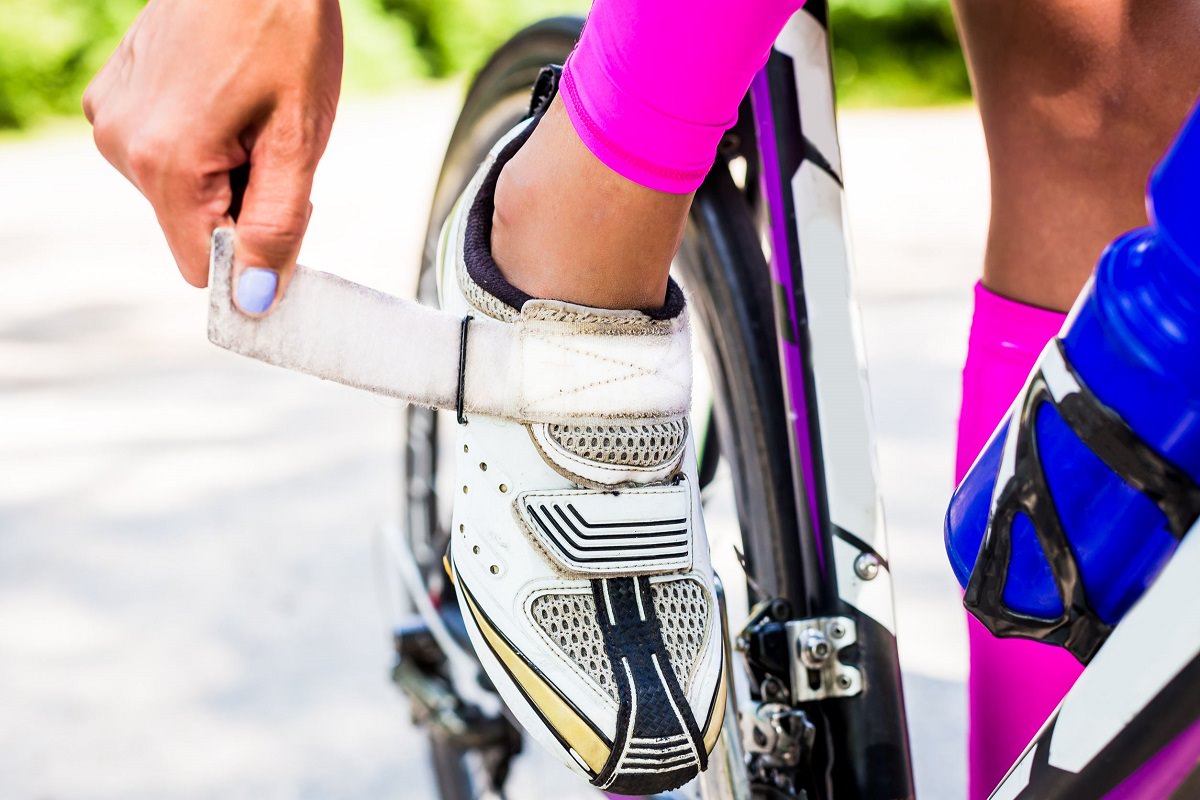
The Case for Cycling Shoes
If your bike may be equipped with clipless pedals, you may want to avoid changing these out for clips and straps in the winter. Also, you may find that the booties are all you need to keep your feet warm at the temperatures at which you ride. There is also the “coolness” factor of bike shoes which some would not forsake if their life (or frostbitten toes) depended on it.
Virtually all cycling shoes are low-rise in design. This means you will have to find a way to keep snow out of the shoe or risk seriously cold feet. Also, almost all cycling shoes are far from waterproof, and therefore unsuitable for wet snow conditions.
These shoes are also not very warm. They are designed for summer use and are poorly insulated and many contain a ventilating mesh panel that lets water pour in. In addition, the cleat attachment system usually employs a metal plate just under the ball of the foot. Once you clip in your foot becomes thermally linked with the pedal, which, in winter, is not pleasant.
Cycling shoes serve best in those areas which have winters that are cool and dry.
Dave Evans Columbus Oh.
The Problem With Cycling Shoes
Cycling shoes are designed with summer in mind. The ventilated mesh panels are designed to let water out and air in. They are not designed for cold climates or wet weather.
The Nike Supa Pooh-Bah, without this mesh panel, (it is pretty small) would be a serious contender for a winter cycling shoe. The Specialized Rockhopper ATB shoe comes close too, but is just a tad short of being tall enough to keep show out without gaiters. Neither is warm enough.
So, although you can find a few almost acceptable cycling shoes, usually ATB shoes, you end up having to wear additional footwear to compensate for the inadequacy of your shoe. That may be good enough for West Virginia, or Northern France, where mild winters are the norm, but anywhere the snow stays for more than two months and the lakes freeze three feet deep you are going to be suffering unnecessarily.
Solutions
Neoprene booties or gaiters can be purchased which will cover the shoe, (but still leave a hole for your cleats to clip in). These are available from Nashbar and also from Performance Bike. These go one over your bike shoe (hiding the coolness thereof), and have cutouts for cleat engagement. They add warmth and wind resistance, but with that big hole in the bottom, they are not waterproof.
Gore-Tex socks and Neoprene socks are worn under the cycling shoe and add a layer of warmth and waterproof protection inside the shoe. With warm regular socks underneath the Gore-Tex or Neoprene you can actually stay fairly warm unless you fill the shoe with water or snow. These products are usually billed as waterproof.
The idea of allowing water into the shoe and stopping it just short of the skin is sort of like wearing rain-proof underwear below regular clothes. It may work, but it is not really the best solution. The best idea is to keep both the water and the cold out.
Selecting Winter-Specific Cycling Shoes
A cycling shoe made specifically for winter is a rare item in the market. There just does not seem to be a big enough market for many manufacturers to even bother making such an item. In fact, it has only been in the last year (winter of 97/98) that there were no real winter-specific cycling shoes on the market at all.
It’s a testament to the growing popularity of icebiking that there are now beginning to appear some good winter cycling shoes.
One of these new arrivals is LAKE. They have designed a shoe specifically for winter cycling. It’s called the MXZ300, and it’s expensive. But it is warm, well-sealed against the cold and the wet, and it will take SPD cleats. It has snug-fitting neoprene cuffs at the ankle to keep the snow out. While roomy enough for extra socks, there are all the proper straps to give a secure fit.
There is also a model for slightly warmer climates, or spring/fall use, the CZX300.
An Italian company, Gaerny has introduced two styles they call the Polar Road and the Polar MTB. New this year, it remains to be seen how they contend with seriously cold weather. Rest assured tests are under way.
Alternative Solution
Believe it or not in some cases less is more. There are a number of cyclists, not always in the coldest of climates, but plenty chilly nevertheless, that swear by SPD Sandals, either from Shimano or those pictured at right from Lake.
What’s this, you say, are they Daft? Not at all. Sandals adapt quickly to the addition of another layer of socks, Gore-Tex Oversocks, or neoprene booties. When out in the cold wet, you won’t have wet shoes, as no water accumulates, it all runs off.
Further, you may not need to change upon arrival at your destination. All you do is strip off a layer of socks (or two), cinch up the straps, and you can wear them around the office or the house.
Cyclists in rainy cold-wet climates like Seattle swear by them.
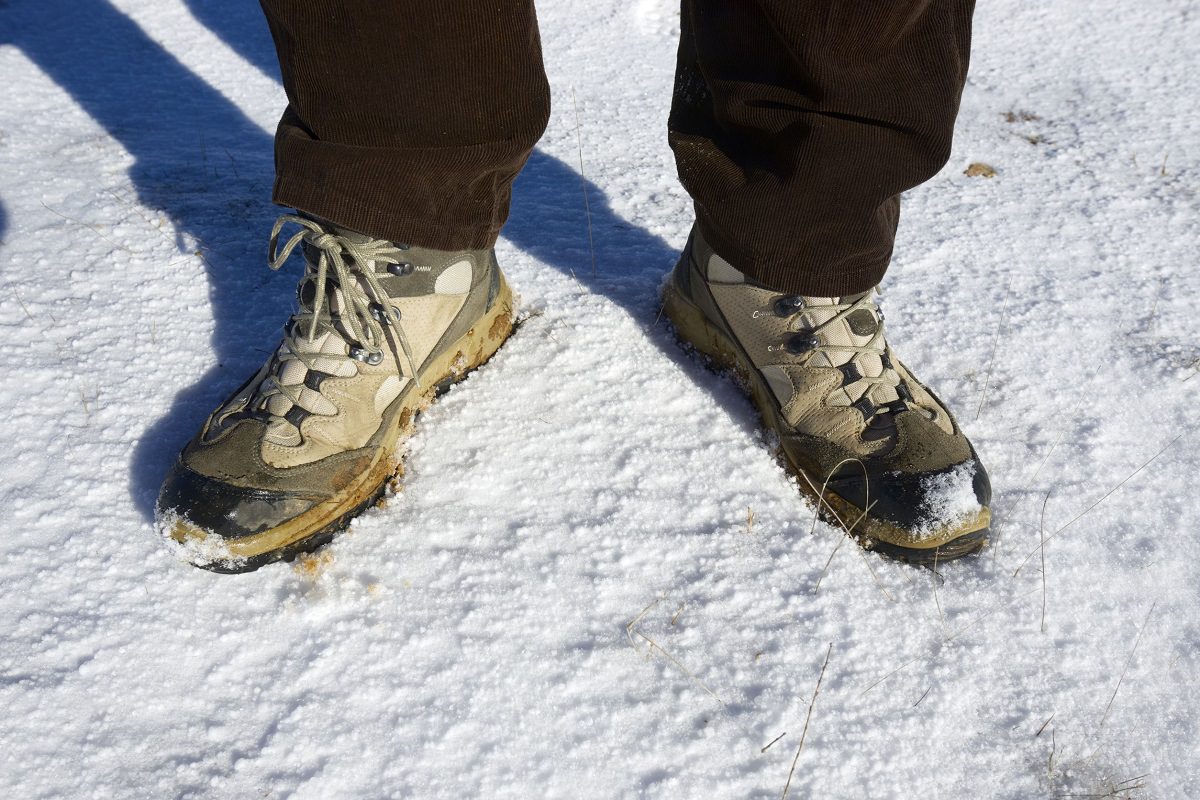
The Case for Winter/Hiking Boots
Once it gets a little colder than freezing, most cyclists will look for something more substantial than summer cycling shoes.
A lightweight boot (with “lightweight” being defined with due respect for your latitude) that is waterproof and at least ankle-high, makes a fairly good cycling shoe. These are probably in your sporting goods store or any good shoe store. There are hundreds to choose from ranging in price from about $40 up to $120 or higher.
These boots work well in cold-wet areas or cold-dry areas.
The Problem With Boots
Boots require you to switch to clips and straps. It’s difficult but possible to modify them for cleats depending on the type of sole. Boots with deep lugged Vibram soles are hard to get in and out of the straps. They catch on the pedal platforms. They are definitely not “cool” although they are far from cold. The pictured boot is one by Rockport, but there are dozens of boots to choose from.
Solutions
Look for an ankle-high or slightly higher model and one that is insulated to the degree you need, or which is large enough to allow wearing thick winter socks underneath. Look for waterproof models, and reject summer hiking models with woven sections. If the boot is leather, you may need to treat it to make it totally waterproof. SnowSeal works well for this but will darken the leather.
At right are the LLBean Snow Treads Which are insolated with 200-gram Thinsulate insulation for cold-weather warmth. They are guaranteed waterproof, Gore-Tex lined, and are very warm. They run about $90 but are very durable and should give many years of wear. Plan on replacing the laces, which are too long and not that durable. The sole is not as harshly lugged as Vibram and the slip into pedals easily.
Look for thin Vibram soles, some have soles that are other than Vibram and these (if the lugs are smaller) can be much easier to get in and out of the pedals. To make Vibram soles a little more pedal-friendly, take a sharp knife and bevel off those lugs where your pedal comes in contact with the sole.
There is one line of lugs just behind the ball of your foot that is the principal obstruction to quick extraction of the foot. You can bevel the forward edge of the front lugs too for ease of entry. This will not reduce your sure-footedness on slippery surfaces much, so the shoes will still be walkable.
For suggestions on how to accommodate clipless pedals with your hiking boots, several icebikers recommend the Syntace SPD adapter. Personally, I’ve found that my SPD cleats freeze up and become problematic in freezing weather when there is a slush about. Every pair I have had has had a metal plate inside which cools my feet very quickly when it’s really cold out.
The type of closure is your choice, but avoid those that lace all the way down onto the top of the toe, and also those with square-topped toes. These are too hard to get into the toe straps.
The Case For “Real” Winter Boots
There are several sources of “real” winter boots, ones for day-long icebiking expeditions or overnight camping. These usually are sold as “thermal” or “polar” or some other such hype.
With a good set of these, you can stand around 40 degrees below zero all day and not get cold feet. These can often be found in army surplus stores. Often these are white in color, very large, and well-insulated. Your feet will sweat in these if you wear them when it is just freezing out.
I am not talking about the old “bunny” boots. The newer model of these is much smaller and easier to get around in. Still mighty serious looking. These would only be called for in very cold and therefore very dry areas.
The Problems With Polar Boots
These boots are hard to find, so start haunting the army surplus stores. These things are really big and hard to get into toe-clips and straps. You will definitely have to get long straps and I have no idea where you will find toe-clips to fit, but the metal kind may be bent to fit.
If you need boots this warm, you are going to be going so slowly that toe-clips might be unneeded. Check out Power Grips (below) for large arctic quality boots.
Different Combinations That Work
Tony Torti from Fairbanks Alaska recommends a combination of cycling shoes with warm waterproof overboots:
“Clipless is fine but a stiff shoe is important for effective power transfer, plus the trails I ride to call for the occasional wade through overflow (water on top of the ice), and absolute waterproofing is a must.
After years of trying different boots with Powers Grips, I found what works for me. An overboot called N.E.O.S. (I found them in Campmor) with a bicycling road shoe inside has finally solved the problem. Very lightweight, waterproof, tough, and with different combinations of socks perfect for a wide range of temps.
A thin pair of polypro or Thermax inside the shoes and a heavy fleece sock over the shoes keep my feet warm at -20F all day long. The socks and leather shoes breathe so a little moisture will collect inside the overshoes but your feet stay dry.
Foam insoles under the riding shoes make a bed that the shoes sink into and besides adding warmth help keep you secure in the pedals. A well-adjusted set of Power Grips keeps you hooked up to the pedals almost as well as Clipless. The N.E.O.S. comes in ankle and knee-high sizes, I recommend the knee highs as they keep you dry even in a deep dunking and add warmth and protection.
For multi-day trips, some sort of campbootie, tennis shoes, or even your favorite slippers can be switched with the riding shoes for wood gathering, etc. These overboots are very well made and after 2 years of abuse show almost no signs of wear. They run about 60 bucks.”
Power Grips For Winter Cycling
Because many icebikers use winter boots or light hiking boots the subject of pedal retention often comes up, and power grips are often recommended.
Power grips by Eko Sport (formerly BPP) are pedals with a diagonal strap across the toe of your shoe. The natural position of your foot while pedaling locks your shoe to the pedal, but a simple heel-out rotation (just like Clipless pedals) loosens the strap for easy exit.
They come in various colors. There are two different configurations, one for around $20 works with most existing cage pedals that accept straps. A complete pedal replacement kit is available for about $30 and a deluxe set is around $66.
Because they are fairly adjustable, these have become a favorite of winter cyclists who need large boots for good cold-weather foot protection. Users report good retention and no problem extracting your foot in a hurry. The strap is flexible but stiff enough to remain open for easy entry.
These will accept larger winter boots than will toe-clips. Some users with large feet use these year around as they are easier to fit into than regular toe clips. The manufacturer even makes large-size straps for winter boots. Just see this posting:
From Power Grip
We have extra long Power Grips for just such lunatics as yourself (actually started making ’em for Alaskans). Most dealers don’t sell these specialty items, so we’re glad to sell them directly. If you’d like a set, call us at 800-999-8277. We can handle Visa, MasterCard, or prepayment.
Regards, Eko Sport.
Posted on the Icebike mailing list by Gordy Seppanen, St. Paul, MN

Auxiliary Heat
Other alternatives for day-long outings in brutal weather include electric foot warmers, heated socks, etc. The best-known brand of these is the Hotronic Foot Warmer. This is an insole that fits into your boots and is powered by batteries with surprisingly long run times – up to 7 hours.
The idea behind these products is not to supply all the heat needed to keep your feet warm, but, rather, just enough to keep your own circulatory system from shutting down blood flow into these extremities.
If you don’t have room in your boots for a complete insole, you may be able to adapt their custom heating elements to your existing shoes. They also have extra battery packs (rechargeable) and other accessories.
Chemical Warmers
Less expensive and more versatile are Hot Rods. These are heat packs that are designed for shoes, gloves, pockets, etc. Available online these heat packs last 7 hours or more.
The heat generation process is a chemical reaction (oxidation) of a mixture of iron powder, water, vermiculite, cellulose, activated carbon, and salt. They are said to be safe and biodegradable (which is still no excuse for wanton discarding the packets once finished with them). Cheap enough to carry spares on long outings, these could be used in many outdoor activities.
Footwear for Extreme Icebiking
1. Shoes and Pedals
If you use conventional pedals you’ll find a lot of choices in warm footwear. People who have trouble keeping their feet warm may want to go this route. Look for shoes that are light and fairly stiff in the sole.
There’s a widely sold type of shoe that looks like an oversized sneaker. LL Bean calls it a Snow Sneaker, we call it a snow jogger. Kinneys, REI, and EMS all sell their versions. The soles aren’t very stiff but they’re light, warm, and inexpensive. They were the shoe of choice in the early days of the Iditabike and remain popular with the more leisurely winter cyclists. Gail Koepf, who’s won more Iditasports and Iditabikes than anyone else, still uses Snow Sneakers to pedal her Litespeed.
2. EMS Snow Walkers
To lessen heat loss through metal pedals, cut out 1/4-inch plywood plates to fit within the pedal cage and wire them to the pedal. For added grip, use grip tape or run about half a dozen small machine screws through each plywood plate.
Power Grips offer some useful advantages over toe clips or no clips. They don’t compress your toes like toe clips, they don’t break in the cold and they engage and release about as easily as Clipless pedals.
The standard size fits Snow Joggers up to sizes in the mid-40s. Bigger feet or bulkier footwear will need the oversized model. BPP makes Power Grips, and they are the best source for the oversized model. The standard size is available through a number of distributors.
3. Clipless in the cold
If you’re used to the advantages of clipless pedals, it’s hard to give them up for winter. The best argument for going to old-style pedals is the need to keep our feet from freezing. However, if you want to go clipless you’ll have to devise a way to attach cleats to winter footwear – or – to insulate clipless-compatible riding shoes.
You can buy footwear that can practically guarantee that you won’t freeze your feet while riding in extremely cold weather for extended periods, but such footwear hasn’t yet been made in satisfactory SPD-compatible form.
So if you want to ride the Iditasport, or just commute by icebike below -20F (-29C) with clipless pedals, you have to commit yourself to a serious level of attention to, and care for, your feet. You have to accept a degree of risk that could be avoided with other systems. People vary widely in how their extremities respond to cold.
None of the shoes made for winter cycling are warm enough in themselves to be used without extra insulation. This means you’ll be buying them oversized and wearing extra layers inside and maybe outside. Three to five European sizes over your normal size is a common solution.
Cycling shoes are often on sale in the winter months, especially the leftover large sizes. Rather than spending hundreds on “winter” shoes, buy any good racing shoe in the appropriate size. Look for models with little or no mesh. Try them on with as many socks as you think you’ll need.
Most shoes have cleat hardware that passes through the sole, providing a good path for heat loss. If you want to experiment with felt or synthetic insoles to counter this, allow room (one more Euro size) when trying them on.
My feet are pretty average in their response to cold and I find that three pairs of heavy socks will keep them happy for many hours at -20 F (-29 C). A heavy neoprene booty extends the comfort range to about -30 F (-34 C.)
PYI/Spokeswear makes heavy neoprene booties up to size 48. I got them to make a run of size 49-50. If your normal shoe size is 45, you’ll be looking at sizes like that for winter. The 49-50 also allows double layering booties if needed.
Sometimes the bootie shifts on the shoe and interferes with cleat engagement. To prevent this you can glue the bootie sole to the shoe sole in the cleat area. If you wear summer shoes in mid to high 30s sizes, you may find it easy to borrow summer shoes that are just right, since shoes in the low to mid-40s are quite common.
4. Clipless Adapters
The other route to going clipless in winter starts with a choice of more winter-specific footwear (boots of some sort) and requires attaching cleats to the soles. Snow Joggers, Nordic ski boots, snowboard boots, and lightweight winter hiking boots all offer good starting points.
Mark the soles where you want the cleats and drill them to take metric 5mm x 0.8 or 10-32 T-nuts. Carve away lugs in the cleat area, leaving at least as much space around the cleats as on your summer shoes. If the sole is stiff enough to hold the cleat securely, great. If not, you’ll need to attach a rigid plate to the sole and then attach the cleat to it.
The holes that secure mountain bike cleats are close together and so don’t resist the torque needed for twist-release very well in a soft sole. Shimano and Syntace both make adapters that are intended for attaching SPD-type cleats to shoes drilled for Look cleats. The Look hole pattern has three widely spaced holes and offers good resistance to twisting. These adapters cost about $15 a pair. Another option is to make your adapter plates out of sheet metal. A couple of hours of cutting and drilling will do it.
The big DH/BMX pedals by Shimano and Wellgo are easier to pedal unengaged and easier to clip into than the more common smaller models. Sometimes snow riding requires lots of dabbing; this type of pedal can be worth the extra weight under such conditions. The Ritchey Logic Pro pedals (the blue ones) work better in clogging snow than most Shimano clones and the Time pedals work better yet.
By Simon Rakower of All Weather Sports (Excerpted from Simon’s article in the Iditabike Manual)
Recap
So there you have it. These are my tried and tested methods of buying water-proof footwear for winter riding. Which footwear do you find comfortable? Let me know in the comments below!
Also Read
- Why Spinning Shoes Are The Best Choice For Indoor Cycling
- How To Layer Winter Cycling Pants And Tights
- How To Do Winter Cycling In Ice And Snow
- 5 Best Winter Bike Tires – Studded Tires For Snow And Ice


2 thoughts on “How To Choose The Best Winter Cycling Shoes, Boots and Footwear”
hello i don’t like using clipless pedals in the winter primary for reasons especially if i am on ice. i went to be able to react fast and i cant drop my foot fast enough when needed
i use pedals with spikes on them but it is hard to find boots that do not have a deep tread or limit my range of motion any ideas
thanks
Great information. Lucky me I discovered your
site by accident (stumbleupon). I’ve book-marked it for later!