Build the Light Setup Around the Darkest Part of the Route
A good lighting setup is not just a bright front light. You need a front beam for hazards, a rear light for drivers behind you, side visibility at intersections, reflectors or reflective gear, and enough battery reserve for delays, cold weather, and the ride home.
| Route condition | Visibility priority | Practical setup |
|---|---|---|
| Lit city streets | Being noticed early. | Reliable front/rear lights plus side reflectivity. |
| Dark paths or rural roads | Seeing surface hazards. | Stronger front beam and backup light. |
| Winter commuting | Runtime and wet-road contrast. | Charge more often and carry reserve. |
| Mixed traffic | Predictability. | Use lights with clear hand signals and lane position. |
Estimate reserve with the bike light runtime calculator, plan the commute with the urban bike commute guide, and use the winter cycling gear guide for cold-weather setup.
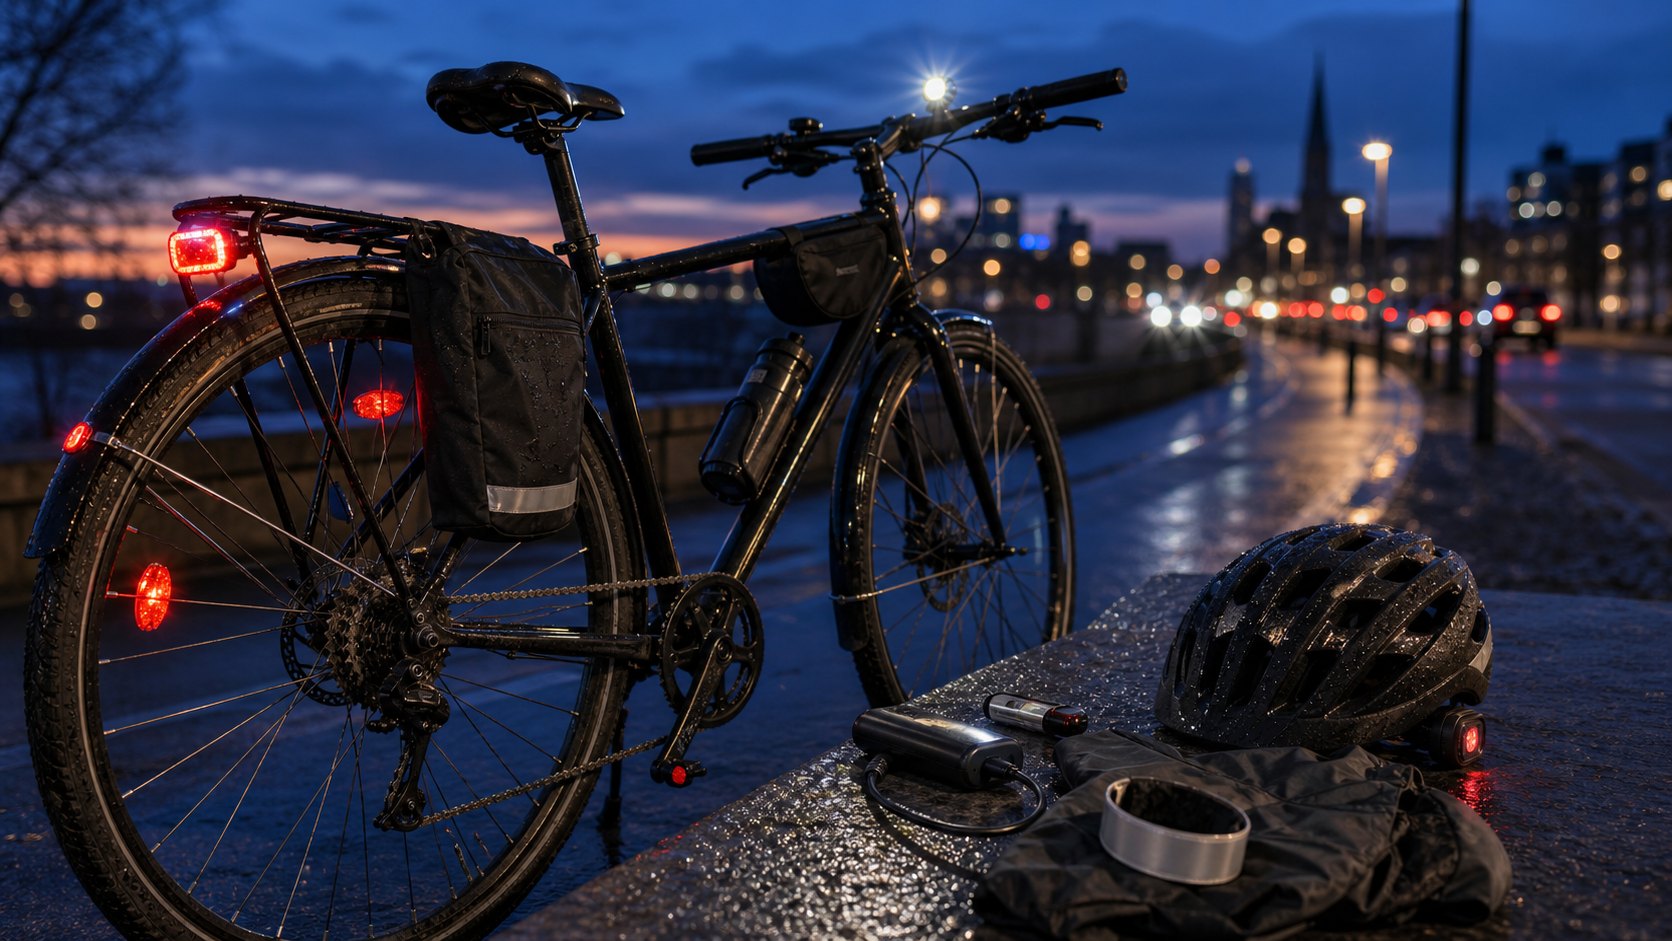
Lights aren’t a winter cycling issue, but since it is dark longer in winter, you tend to need bicycle lights in the winter. You want to be sure that your choice works in the cold. Remember, that if you ride the roads, you need brighter lights than on the trail, because roads tend to be cleared of snow and ice, making the surface darker, taking more light to illuminate it Snow is very bright.
On the other hand, if your winter has much rain, there is nothing darker than a wet road at night, and the bigger the lights the better. Vision is affected by age. What is adequate light for someone in their twenties is very likely inadequate for someone over 40. As we age, the lens of our eyes grows stiffer and less elastic. The pupils can no longer dilate to the degree it did in youth. This means we simply need more light to see well.
Road surfaces normally reflect light in all directions, including back toward the source. That portion reflected toward you is the only part that does you any good. The rest is wasted (other than allowing other road users to see where you are).
Wet or icy roads, especially roads covered with a thin layer of black ice reflect almost all light forward. Very little bounces back to you. If you want to see the road surface you have to put more light on it. Finally, cold weather affects both bulb output and battery output, making lights dimmer. We will address this below.
All of these factors argue for bigger and brighter lights for winter riding. Yet some folks can get by on just three watts. It depends on age, road surface, and snow cover. To avoid being blinded by oncoming headlights a high beam of at least 20 watts is very useful. It will usually illuminate the road a few feet ahead even in the “teeth” of oncoming cars.
But bear in mind that, just because you can see, does not mean that others can see you. Lots of motorists are of an age where they can not see as well at night as younger people. Further, the headlight in the eyes of oncoming cars that makes it so difficult for you to see the road also makes it more difficult for overtaking motorists to see you.
Remember, half the job of lights is to make sure motorists see you.
Bike Light Guide
When Do You Need Lights
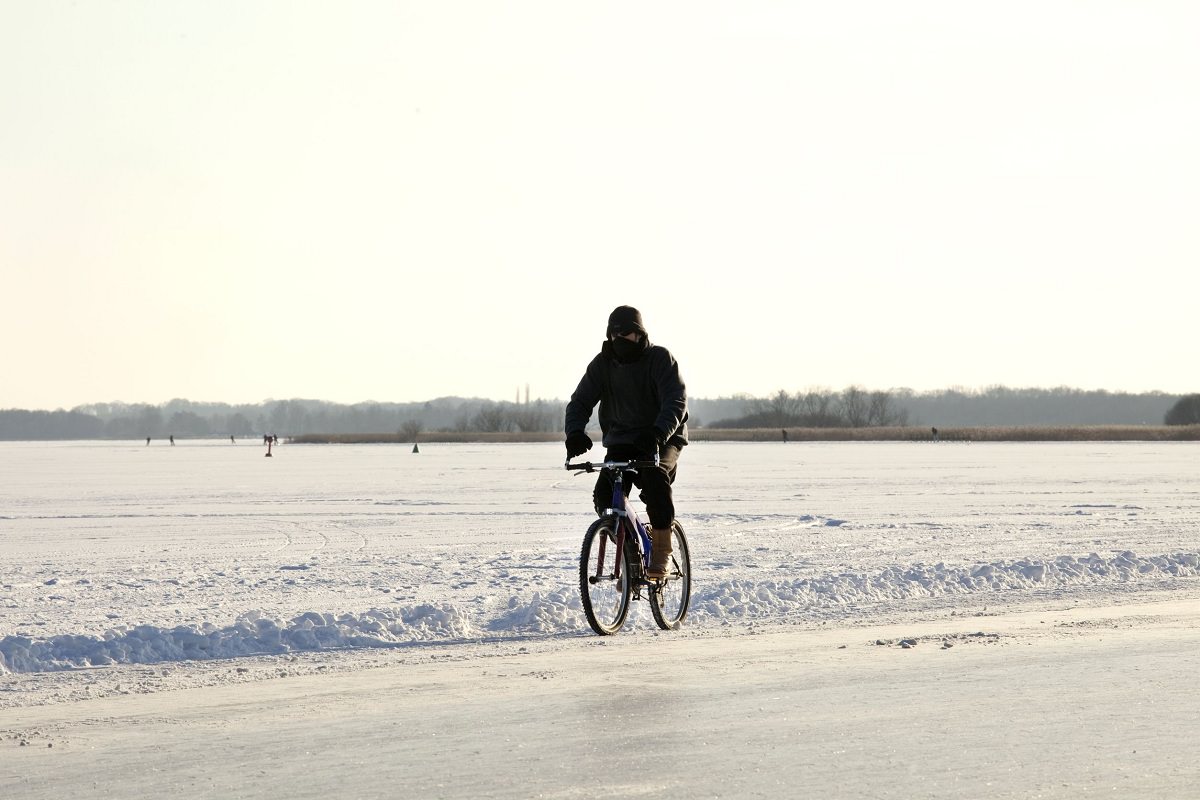
In most states and provinces you need lights beginning a half hour after sunset till a half hour before sunrise, or any other time that persons or vehicles are not discernable on the highway, (this could include heavy snowfalls).
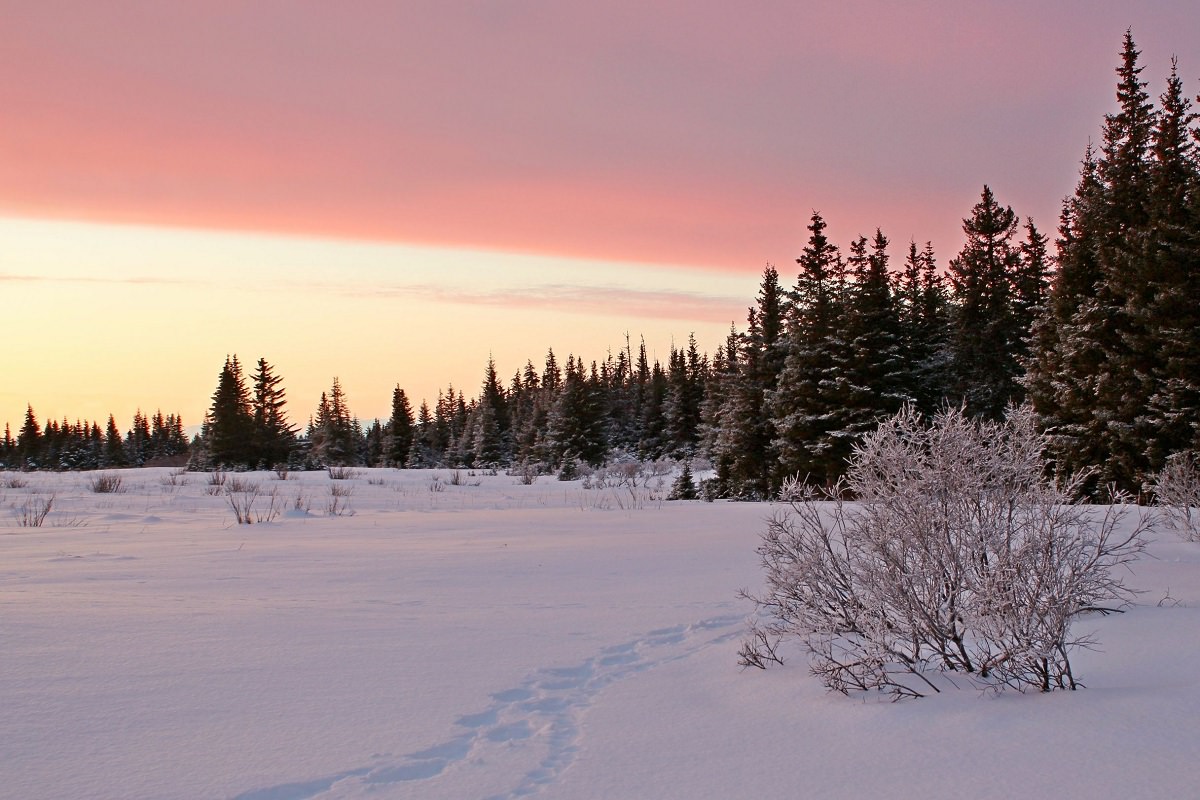
On nights where there is a good full moon you can ride on snow with no lights at all, but just make sure there are no cars around. Frozen solid lakes where roads have been plowed or the wind has blown the snow off can be especially enchanting on a moonlit night. Backwoods roads where the snow cover is not too deep are almost magic to ride at night.
What Do You Need?
Well, we each have our preferences, but my first priority is brightness. Not just because its hard to see, but because being seen is even more difficult. If you are doing city riding, you need more light than country riding. 6 watts is adequate on a dark country road but would be overpowered in a city environment.
Don’t make the mistake that just because there are street lights you don’t need much lighting on your bike. In the city or dense urban areas, 6 watts is the minimum. And, a headlight is way more important than a taillight, but most states and provinces require both. Don’t discount the effectiveness of reflectors, reflective clothing, and reflective patches on your shoes. These things get noticed. The NightRider Tail Light is the brightest in the business as of this writing.
Blinkie tail lights, like the VistaLight 700 (under $20), one of the brighter of small self-contained units, work best in pairs. This is because they will get out of sync with each other, and appear to dart back and forth. This gets noticed much farther away and holds attention longer. These things are seldom affected by cold.
Special Winter Cycling Needs?
Are there special lighting needs for winter riding? Not normally, but when it is snowing heavily you might consider a strobe. These produce a “ball of light” around you as they reflect off of the falling snow. This lets motorists see you a lot further away (squinting out of the little frost-free patch they scraped on the windshield).
There are several strobes on the market which can be found at sporting goods stores. The legality of these for bicycle use is questionable, but if you attach the strobe to your arm and not the bike you probably won’t have a problem. I’ve never been stopped by the police for being too safe!
Some people say these strobes can irritate drivers. Good! Perhaps they will stay well away from me. The strobe can be irritating to you the cyclist as well, so keep it behind you, out of your direct field of view. Group rides at night should rely on the tail-end Charlies to run the strobes.
Additional winter concerns regarding light are waterproof housings and connectors. Water and even road salt will get into everything. Quick-release battery attachments are nice because you often want to bring your battery (if not your whole light set) inside to prevent theft and keep the battery warm.
You will also find that switches are harder to operate with gloves on, so avoid recessed switches or tiny hard to get at and fragile little levers.
No Battery Solutions
In addition to Lead-Acid, NiCads, and NiMH batteries, there is another solution for an energy source. The hub generator. This is a generator built into a front hub, becoming part of your front wheel.
These generators produce electricity only when you are moving, but the better units have enough associated battery power to keep your lights (or substitute lights such as LEDs) burning while you are stopped at stoplights.
These units are unaffected by cold weather and have no run-time limitations. While expensive, they are competitive with the higher-priced lights, when you factor in the cost of replacement batteries every two or three years.
Typically, these systems use much smaller wattage than the battery systems. They attempt to compensate for this small output by having a much more sophisticated light bulb technology, producing a very focused beam just where you need it. See the excellent write-up on one such system located at icebiker Peter White’s site.
Performance Of Lights In The Winter
Cold temperatures will affect battery performance. With Lead-Acid batteries, serious cold, anything from 20 degrees below freezing on down, can damage the battery if not fully charged. In all batteries, energy output will be reduced by the cold.
Lead Acid batteries are more affected by cold than are NiCads. The amount of power a lead acid battery can produce is greatly reduced by the cold. At 0 degrees Fahrenheit (-17.8 degrees Celsius), a lead-acid battery will deliver only about 40 percent of the power it would at 80 degrees Fahrenheit (26.7 Celsius).
If a battery is not fully charged, the electrolyte can freeze and damage the plates or crack the container. Batteries at usable states of charge will not freeze at temperatures above 20 degrees Fahrenheit (Source: Exide Battery FAQ).
Nicads, under the same conditions, are producing 78% of the power they would produce at 80F. This fact alone makes NiCad better for icebiking.
This is not so much of a problem if the battery is kept indoors until you are ready to ride. NiCad batteries will produce internal heat as they are being used (exothermic) and this is usually enough to keep it operating efficiently.
However, if you leave the bike outside for several hours, you may find that the battery will produce lower light output, or, in extreme cases will not work at all. After being warmed up, it will work again. Lead Acid batteries are endothermic, they do not produce internal heat when being drained. This is another strike against them for serious cold weather use.
The Battery Rant
Several posters on the Icebike mailing list were concerned about battery disposal and the materials used in batteries. Typically lead or nickel-cadmium, each type has its disposal requirements.
If your battery dies, consider sending it back to the manufacturer for disposal, or take it to a battery store and ask for advice there. Some cities have recycling programs for dead batteries.
In some states (such as Alaska) any place that sells batteries must take them back for disposal, even if you purchased them elsewhere.
Some riders (and dog mushers) keep flat battery packs inside their jackets to keep them warm for maximum running time. Also affected will be bulb performance, especially if you are using halogen bulbs. Tungsten-halogen lamps feature a tungsten coil filament mounted in a quartz glass envelope that has been filled with an inert gas plus a trace of halogen (normally bromine).
This gas creates the “halogen cycle”:
- Tungsten that has evaporated from the filament combines with the halogen gas.
- Convection currents within the bulb carry this gas to the quartz wall where it is cooled and then returned to the proximity of the filament.
- The heat of the filament causes the tungsten and bromine to separate, and the tungsten is then deposited on the cold portion of the filament.
This regenerative process prolongs the life of the filament considerably and also eliminates the blackening of the bulb by preventing the evaporated tungsten from condensing on the envelope.
Tungsten-Halogen lamps must be operated at voltages that maintain an envelope temperature between 250 and 350 deg. C. Cooler temperatures will not allow the halogen cycle to take place, tungsten is simply deposited on the inside of the glass, not re-deposited on the filament. This causes bulb blackening and shorter life; higher temperatures will cause oxidation of the conductors and lead to premature lamp failure.
Bike lights typically are hard-pressed to maintain that high temperature in seriously cold weather. Expect to replace bulbs every other year or so as they grow dimmer.
Reflectors
 Yup, cheap and always on the job. Reflectors are always with your bike even if you forget your lights or your battery packs it in. And reflectors do an amazingly good job.
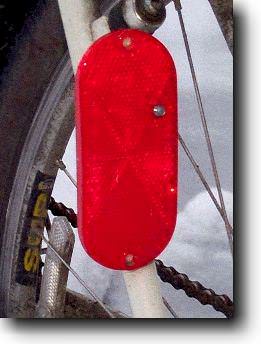
Now I’m not talking about those minimalist reflectors that came on your bike which serve to satisfy the letter of the law, but rather a standard automotive reflector. These usually bear the letters SAE (Society of Automotive Engineers) and are usually several times brighter than the toy reflectors that came on your bike.
The variety pictured on the left is about 3 inches tall. It is mounted on the reflector mount that came with the bike via a single screw. It costs 98 cents at an automotive parts store and comes in packages of two.
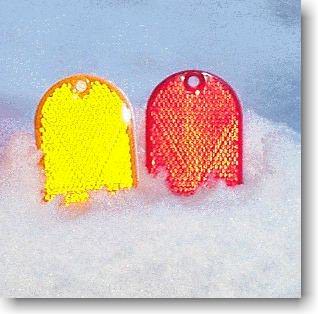 These reflectors (or ones very similar) are available in amber or red. Your local laws may have something to say about which colors you may use, but by and large cyclists never get in trouble for being TOO SAFE.
When I stuck an amber and red reflector in the snow and hit them with the camera’s flash, the amber was brighter. This may just be due to the flash.
In an automobile headlight beam, either is likely to be very bright. Many cyclists remark about being asked by their motorist friends what kind of tail light they have that is so Bright. Often it’s just the lowly reflector.
Reflectors are never “overpowered” by car headlights like LED flashers can be.
How Well Do They Work?
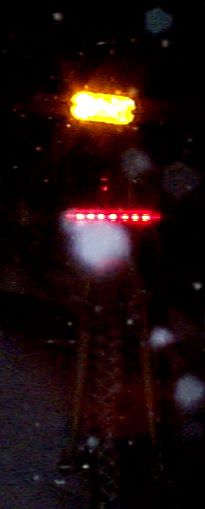 At right is a bicycle parked in the dark. Sorry for that white blotch, it was snowing heavily at the time. This is, after all, an Icebike.org site!
On the back of the bike seat is the amber reflector pictured above.
Below it is the brightest tail light that I am aware of, the 9 Led NightSun 12 volt tail light. (Seven rear-facing LEDs and one on each side, mounted in a water-tight tube). In the camera flash, the reflector wins hands down.
But wait, there’s more. Directly between the two (mounted vertically) is a fairly bright blinkie – running on steady (not flashing). You can barely see it because the reflector tripped the camera’s auto exposure circuit before the blinkie even registered. To the human eye, the blinkie is far more noticeable than shown here.
Now, don’t assume that the reflector will always be better than a tail light or even adequate all by itself. The flash was aimed directly at the reflector in these tests. Car headlights are aimed lower.
Further, that NightSun tail light can be seen half a mile away, long before the headlights hit your reflector, and it stays bright even when the headlights are not directly pointing at you, such as on curves, or at dusk before all drivers have turned on their lights
Still, automotive-type reflectors do a very good job, and since reflectors are required on bicycles in most jurisdictions, you might as well replace the wimpy ones with good ones. Mount your reflectors LOW. I mount mine just below the brake boss on the traffic side as seen in the top photo. The rear of the fender is another good location. Don’t forget the reflective striping on your jacket.
Those wheel reflectors (also visible in the photo) don’t do much in normal night-riding situations. While they readily identify the vehicle as a bicycle (I would just as soon the driver thought I was an 18-wheeler, thank you), they can only be seen from the side.
This is seldom helpful because when you stop and think about it, even a reckless cyclist will only be sideways to a car’s headlight beam for a fraction of a second. In that fraction of a second, the bicycle will flash into view, and disappear, or be hit. There is no time for the driver to react. If the driver didn’t see the cyclist until it entered the headlight beam (the only place where reflectors will work) then the accident or near miss is already pre-determined. This is why you need LIGHTS.
Battery Repair
All good things come to an end, usually at the most inappropriate time. Bike light batteries are no exception.
After three seasons of service, my bike light battery was getting wimpy even after a full charge. It seemed dim, and the run time was poor. Even after an overnight charge, the best it could muster was just under 9 volts.
It would cost over a hundred dollars to replace the battery with a new one from the manufacturer.
This was the second time this had happened. I still had some salvaged NiCad cells from the first battery that failed, several years earlier, also after delivering years of service. I decided to see if I could come up with another season of service by combining the cells from these two dead batteries into one serviceable battery. I had nothing to lose, in that the newer battery was no longer serviceable in its current (or lack thereof) condition.
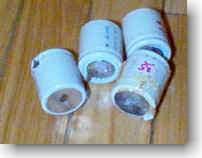
In my case, the batteries were both of the same brand. NightSun in particular. These are water bottle batteries, composed of 10 cells in a bicycle water bottle designed to fit in your water bottle cage.
 Before doing anything to the the newer battery, I gathered the older cells and set out to determine which were salvageable I separated each cell from the old battery pack. Using power from the charger supplied with the batteries, I charged each cell individually for 30 seconds. (Plus wire to Plus terminal, Minus to Minus).
I was charging with 12 volts into a 1.2-volt cell. This may seem excessive but the charge was for only 30 seconds per cell. I didn’t want to fully charge the cells, just to give them all the same charge opportunity, hence the 12 volts for 30 seconds routine. NiCads can take a lot of juice when they are dead, and these were quite dead. Besides, I was carefully timing 30 seconds each.
After the charge, I let them sit for 5 minutes (NiCads exhibit a self-discharge just after charging – I wanted to avoid measuring any misleading voltage during this period.) I then arranged the cells on the bench in order of those having the highest voltage, and kept notes.
I let them sit overnight and measured the voltage again. Some were completely flat. Others were still near the voltage I had measured just after charging. From there, I selected the 3 or 4 best. I expected to need two or three because my NightSun was measuring only 8.75 volts after a full charge. I guessed that either all cells were in moderate decline, or there were two or three that were really bad. I was hoping for the latter.
 So with my resignation, I decided to murder another NightSun battery. I got my tin snips out (any scissors would have done as well) and split the water bottle open from stem to stern.
As expected (from prior experience) the bottle was filled with foam, and the batteries were encased in such a way as to prevent them from jiggling around. The newer foam was far more uniform than that found in the older battery and easier to peel away.
But here I received a surprise. The newer battery which carried a higher rating than the old one, had smaller cells, a bit taller, but smaller in diameter. I worried about compatibility, but not for very long. I had two dead batteries and nothing to lose.
Carefully I peeled this foam stuff off by hand, so as not to damage any of the wiring. NightSun uses flat wires that snuggle right up to the battery and take no room. These are covered with a plastic sheath to prevent shorting.
 Without separating any of the batteries, I laid them out on the floor and measured each cell individually for voltage and then again for resistance. Note that they came out of the bottle in sets of two, stacked one on top of the other and shrink-wrapped together. I measured each set looking for weak sets, then further separated the weak sets into individual cells to find the bad ones. Two adjacent cells were completely dead, with no voltage at all, and no resistance either. These two cells, which were shrink-wrapped together, had simply shorted out, and taken themselves out of the picture, neither helping nor hindering the rest of the cells. Probably the result of over-charging, I blame no one but myself.
I figured these two had caused most of the loss of power, but that there might be another weak cell in there as well. But careful metering of all the remaining cells showed no other contender for worst of the lot. I decided to use the rest, and a couple of my salvaged cells from my prior battery.
Note: when obtaining cells of any kind for repairing your batteries, always try to buy the kind with solder tabs. Its generally not advisable to solder on batteries unless you are careful to do it quickly. The key to getting a quick solder job is a fine (thin – very thin) layer of soldering flux on the to-be soldered surfaces. This way you will get the job done in one go without heating the battery for more than a few seconds.
 Picking the two best of my previously salvaged batteries, I soldered their tabs together (Plus to Minus). Then I cut the flat wires of the newer battery as close to the dead cells as possible and soldered these to the tabs of the replacement cells. Again, always watch your polarity.
I found a suitable water bottle from my collection. I was looking for a wide mouth to make it easier to fit the chain of cells into the bottle. You have to carefully jiggle the batteries down into the bottle, so that they stager themselves side by side. You don’t want any to be sitting on top of each other where they might short out. Careful work with a pencil can generally fit them in almost like they were arranged in the original battery.
I had the added problem of fitting the two fat batteries into the bottle. I ended up with two layers of batteries instead of the one layer that NightSun produced. But my second layer was sitting on top of the cell they were connected to (plus to minus) so shorting out would not be a problem, as that is where the wire ran anyway.
At hardware stores or building supply centers, you can buy spray cans of foam used for insulating around window casements during construction. One can in way more than you will need. Spray this stuff into the bottle around the cells. Do a little at a time, trying to spray to the bottom of the bottle first (‘cuz you can’t get there once the top fills up). This stuff expands like crazy. Spray a little, watch, see where the holes are, and spray a little more.
Finally, I strung the wires out of the bottle spout and hot glued the opening to prevent water intrusion.
Charging the battery overnight brought it up to 12 volts. After an hour of sitting around it was down to 11.9, but that was acceptable for old cells. I could have put another one in there, and still been within the limits of what the bulbs could handle.
I’ve used this battery for several weeks now and its run time is sufficient for a couple of days without a recharge and its brightness is restored.
NiCad cells for repair jobs can be found through several sources on the internet, a quick web search will find dozens of such places. It is always better to obtain something as close to the original cell as possible. Sometimes you can tell by the markings what ratings are needed. Other times the original manufacturer will sell you replacement cells, but by and large they only want to sell you complete batteries – at high prices.
Take-Away
Never throw “dead” NiCad batteries away. In the first place, they must be recycled as the cadmium is quite toxic. In the second place there are usually just a few bad cells in the battery that can be replaced, or, conversely, several that can be used to replace cells in other batteries.
Update: I got another season of use out of this repaired battery, but the next season, I replaced it as additional cells began to fail.
Also Read: 15 Best Bikes For Heavy Riders
