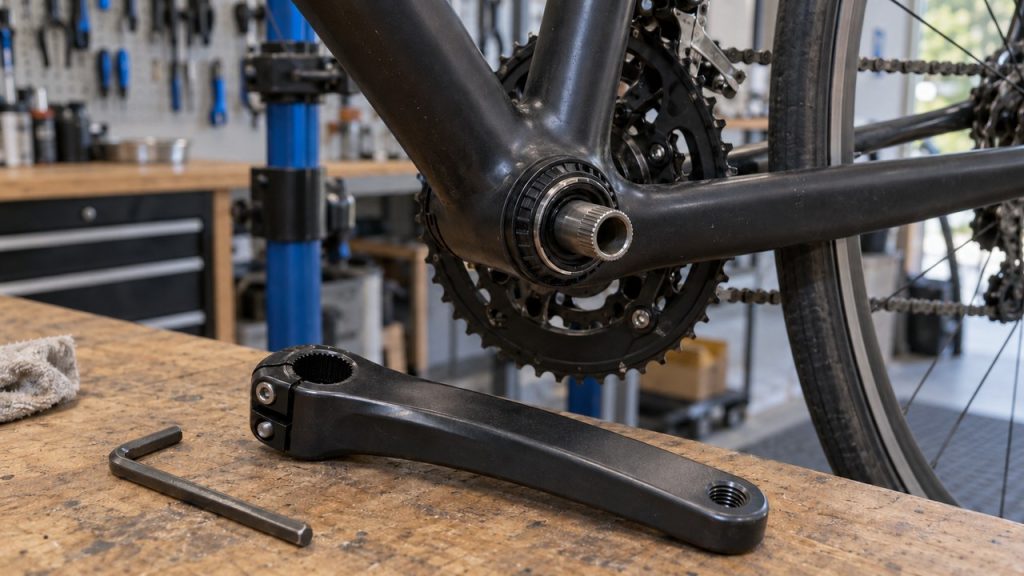
How you remove a bike crank depends on how the arm attaches to the spindle. Square taper, Shimano Octalink and ISIS cranks need a crank puller, a $17.95 to $21.95 tool at Park Tool list prices. Shimano Hollowtech II cranks come off with a hex key and a plastic cap tool. SRAM DUB, GXP and other self-extracting cranks need only a hex key. On almost every crank the bolt loosens counterclockwise, on both sides of the bike. The two exceptions, Campagnolo’s left-hand titanium screw on 12-speed Super Record cranks and the left side of a one-piece crank, are flagged in their sections.
Find your crank type in the table first. Then follow the steps for that family, and use the torque table at the end when it goes back on. The puller-free shortcuts you see in forums (riding with the bolt loose, hammering the arm) ruin square-taper arms, and the section on removing a crank without a puller explains why.
Identify your crank before you buy a tool
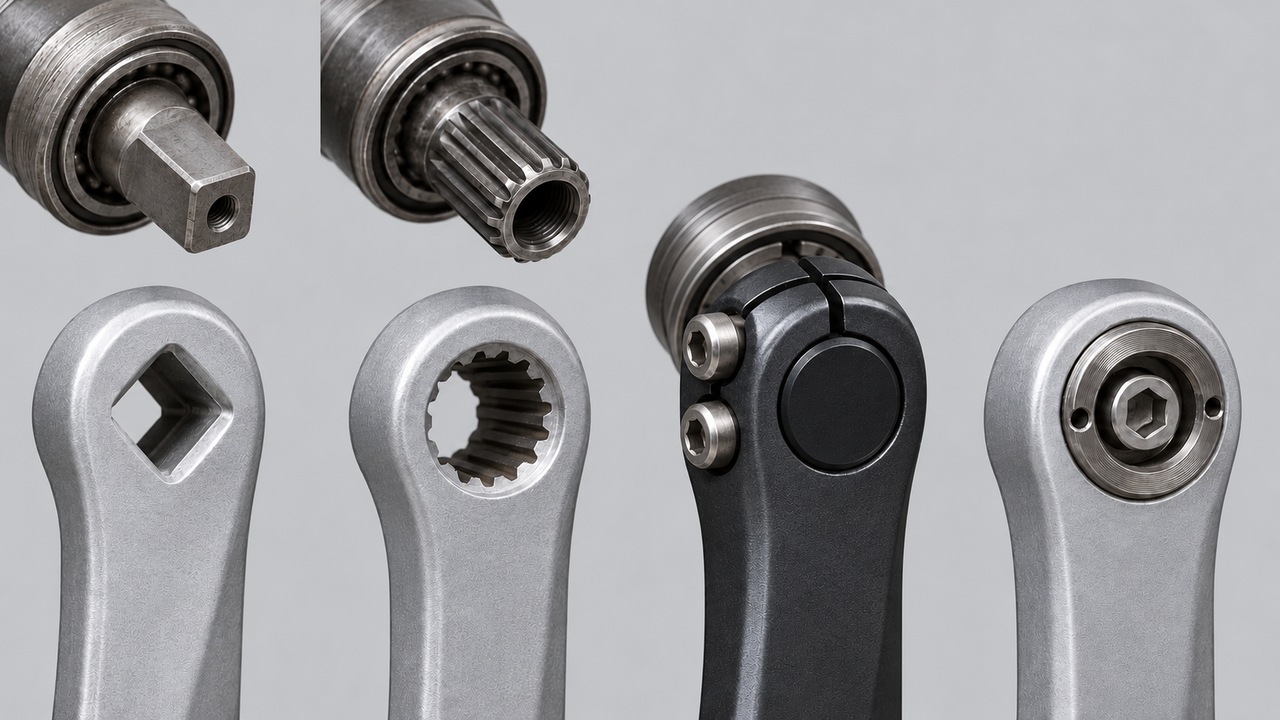
Pop the plastic or alloy cap off the center of the left crank arm, or look for pinch bolts on the side of the arm. What you find tells you the system. Park Tool’s crank guide uses the same checks: a bolt inside each arm means a three-piece crank, a split left arm with two pinch bolts means a compression-slotted crank, and a cap ring around a single bolt means a self-extracting crank.
| Crank type | How to spot it | Tools to remove it | Puller needed? |
|---|---|---|---|
| Square taper (three-piece) | A bolt in each arm under a dust cap. With the bolt out you see the square end of the spindle. | 8 mm hex, or a 14 mm (some 15 mm) socket for a hex-head bolt or a nut on a threaded spindle (Park’s CCW-5 has the 8 mm hex and 14 mm socket), then a CCP-22 or the CWP-7 with its small foot | Yes |
| Shimano Octalink or ISIS Drive (splined three-piece) | A bolt in each arm. The spindle end is round with splines: 8 splines on Octalink, 10 on ISIS. The two do not interchange. | Hex key for the bolt, then a CCP-44 or the CWP-7 with its large foot (for M12 and M15 bolts) | Yes |
| Shimano Hollowtech II, FSA MegaExo | The left arm has a slot and two pinch bolts. A cap sits in the center. On threaded frames, the bearing cups sit outside the frame. | 5 mm hex for Shimano pinch bolts; cap tool (Shimano TL-FC16 or TL-FC18, Park BBT-9 or BBT-10.2); FSA caps take an 8 mm hex; soft mallet | No |
| SRAM DUB | One bolt with a cap ring around it in the drive-side arm. Many have a preload adjuster with a small bolt on the left side. | 8 mm hex, 2 mm hex for the preload adjuster, rubber or plastic mallet | No |
| SRAM GXP | One bolt with a cap ring in the left arm. The spindle is part of the drive-side arm. | Hex key for the bolt (check the size on your arm), mallet | No |
| Other self-extracting (Race Face, FSA, Shimano one-key release) | A threaded ring around the bolt, often with two pin holes or a large hex. | Hex key for the bolt. A pin spanner (Park SPA-2 or SPA-6) or 16 mm hex (Park BBT-16) only if the ring needs retightening | No, the ring is the puller |
| Campagnolo or Fulcrum Ultra-Torque | No bolt in either arm. A long central bolt sits deep inside the left half-axle. A retaining spring clip sits on the drive-side cup on 12-speed cranks, on the left side on Super Record 2×13 Wireless. | 10 mm hex at least 65 mm long (Campagnolo UT-BB110), small flat screwdriver for the clip | No |
| Campagnolo Power-Torque | A 14 mm hex bolt in the left arm, spindle fixed to the drive-side arm, clip on the drive-side cup. | 14 mm hex, Park CBP-8 kit (its #1198 plug), large mallet | No factory method; see below |
| One-piece (Ashtabula) | One steel piece runs from pedal to pedal through a wide bottom bracket shell, with a big locknut and cone on the left. | Pedal wrench, adjustable wrench, cone tool (Park HCW-18) or pin spanner | No |
Skip ahead if your bike is a kids’ or department-store bike with one solid steel crank: Park Tool’s one-piece guide has you remove the left pedal (it unscrews clockwise), then the locknut and the adjusting cone, which comes off clockwise because the left side is left-hand threaded. Pick out the left bearing retainer, then rotate and slide the crank out through the shell.
Square taper, Octalink and ISIS: removal with a crank puller
A three-piece crank is pressed onto the spindle by its bolt. Park Tool notes that a fully tightened crank bolt can hold the arm with over 14,000 newtons (about 3,000 lb) of force, so the arm will not slide off once the bolt is out. The puller pushes on the spindle end while it pulls on the threads in the arm.
- Shift the chain onto the largest chainring. Park recommends this to keep your knuckles off the teeth.
- Remove the dust cap. Some pry out, some unscrew with a hex key or coin.
- Turn the crank bolt counterclockwise and take it out. Park says to remove any washer under the bolt before you fit the puller.
- Pick the puller tip. M8 bolts (square taper) take the CCP-22 or the CWP-7 small foot. M12 and M15 bolts (Octalink, ISIS) take the CCP-44 or the CWP-7 large foot. The small tip can slip into the larger bolt hole of a splined spindle instead of pushing on its end.
- Turn the puller’s center driver back until it sits recessed inside the tool body.
- Thread the puller body into the arm by hand, all the way, then snug it with a wrench. Park warns that a puller that is only partly threaded in can damage the arm’s threads.
- Turn the driver clockwise. You feel resistance when it meets the spindle. Keep turning until the arm pops free.
- Unthread the puller from the arm and repeat on the other side.
Skip this if the puller will not thread in smoothly by hand. Forcing it cross-threads the arm. Go to the stripped-threads section instead.
Shimano Hollowtech II and FSA MegaExo
These cranks need no puller. The left arm clamps onto a spindle that is part of the drive-side arm, and the cap only sets bearing preload. Park Tool’s procedure:
- Loosen both pinch bolts on the left arm. Shimano uses a 5 mm hex.
- Unscrew the cap counterclockwise. Shimano caps take an eight-point splined tool (Shimano TL-FC16 or TL-FC18, Park BBT-9 or BBT-10.2). Shimano power-meter cranks (FC-R9200-P, FC-R9100-P, FC-R8100-P) use a mounting ring and the TL-FC40 instead. FSA caps take an 8 mm hex.
- On Shimano, look in the arm’s slot for the small stop plate and lift it with a thin screwdriver or the hook on the BBT-10.2. Park calls it a safety backup that prevents left arm removal, so the arm will not come off until you lift it. FSA has none.
- Pull the left arm off by hand. Tap it with a soft mallet if it sticks.
- Pull the drive-side arm and spindle out to the right. Tap the left end of the spindle with a soft mallet if needed.
Park notes the splines are keyed, so the left arm only goes back on 180 degrees from the right arm.
SRAM DUB, GXP and other self-extracting cranks
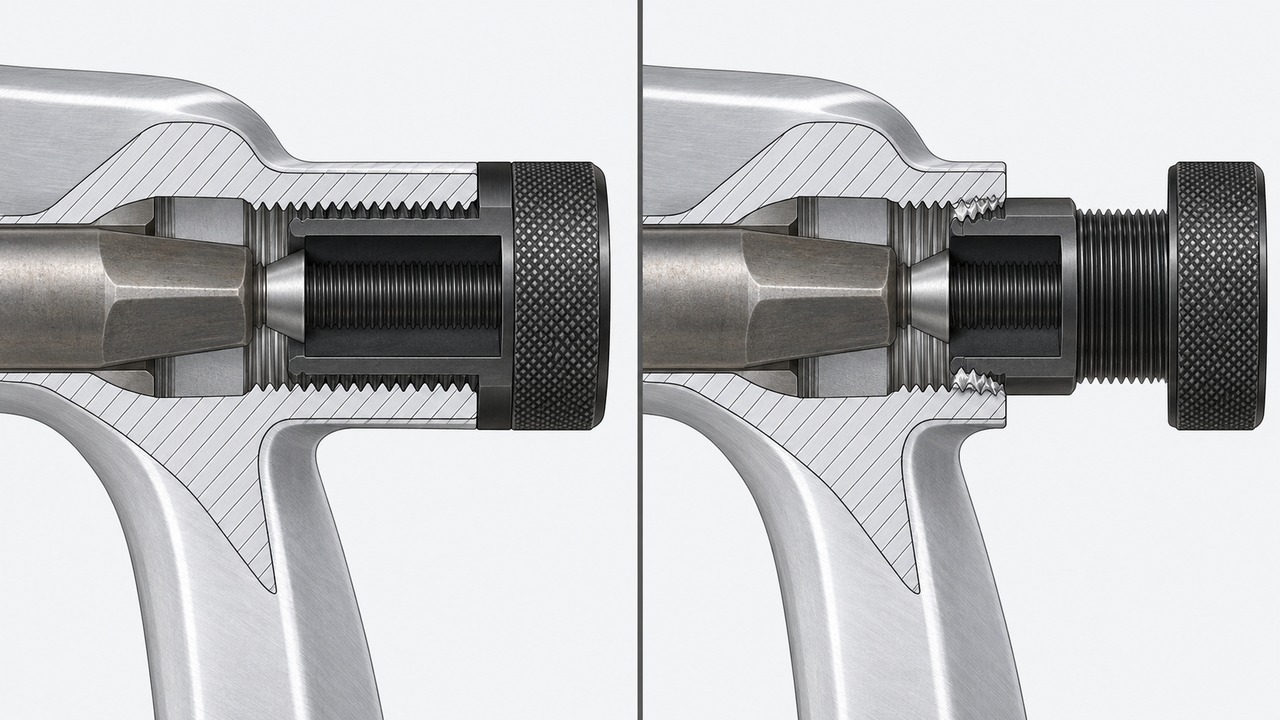
A self-extracting crank has its puller built in. The cap ring around the bolt stays put, so as you back the bolt out, the bolt’s shoulder pushes against the ring and drives the arm off the spindle. Park Tool says to check that the ring is tight in the arm before you start and to leave it in place. If the ring is loose, the bolt just unthreads and the arm stays put.
SRAM DUB, from SRAM’s DUB user manual:
- Loosen the crank arm bolt counterclockwise with an 8 mm hex. It gets stiff again partway out while the cap pushes the arm off. Keep turning.
- Remove the drive-side crank arm.
- Tap the spindle from the drive side with a rubber or plastic mallet.
- Pull the left arm and spindle out of the bike.
- If the left arm has a preload adjuster, loosen its small bolt until the adjuster turns (SRAM says do not open the gap past 1 mm) and rotate it back against the arrow until it stops, so it starts from zero when the crank goes back in.
SRAM GXP works the same way from the other side. SRAM’s road crankset manual places the spindle on the drive-side arm, so the self-extracting bolt sits in the left arm. Loosen it, let the cap push the arm off, and slide the drive-side arm and spindle out to the right.
Leave the DUB cap in place and turn only the 8 mm bolt. SRAM threads the cap in reverse: it tightens counterclockwise, to 14 N·m. If the cap spins loose, retighten it counterclockwise before you loosen the bolt, or the bolt backs out without pushing the arm off.
Campagnolo Ultra-Torque and Power-Torque
On Ultra-Torque, each arm carries half the spindle and its own bearing. Park Tool’s steps: pry the retaining clip off the drive-side cup (on 2×13 Super Record Wireless it sits on the left side), then loosen the central bolt with a 10 mm hex at least 65 mm long. Pull both arms out. The bearings come out on the arms.
Check the arrow on the screw head before you turn it; Campagnolo tells you to follow it. Most central screws loosen counterclockwise. The titanium FC-SR008 on 12-speed Super Record and Super Record Wireless cranks is left-hand threaded and loosens clockwise. The titanium FC-SR010R on Super Record 2×13 Wireless is a standard thread. The 2×13 crank also swaps sides: its retaining spring sits on the left crank and its wave washer in the right cup, where 12-speed cranks have the spring on the right and the wave washer in the left cup. Note which side yours came from so it goes back the same way.
Power-Torque is the one family to think twice about. Park Tool says it lacks any factory-designed removal method, and Park’s workaround drives the spindle out of the left arm by striking an extension plug with a large mallet while someone braces the bike. Remove the drive-side clip, then the 14 mm bolt, before you start. Without the CBP-8 kit, take it to a shop.
How to remove a crank without a puller
If your crank is a Hollowtech II, DUB, GXP, self-extracting or Ultra-Torque type, you never needed a puller. Hex keys and, on Shimano, a cap tool do the job. If it is square taper, Octalink or ISIS, no safe method skips the puller.
The methods people suggest, and what each one costs you:
- Loosen the bolt and ride until the arm works loose. Park Tool describes this only for an arm whose threads are already stripped, and its version keeps the bolt in: loosen it three or four turns, then ride hard uphill. The flexing enlarges the square hole and ruins the arm. Park also notes that once the spindle end no longer sits recessed inside the hole, the bolt cannot hold the arm tight and the crank must be replaced. Forum versions that pull the bolt out entirely leave nothing holding the arm on. Ride this way only on an arm you plan to throw away. Our advice: use a quiet road or parking lot, keep the speed low and check the arm every few minutes, because it can drop off if the bolt backs out.
- Hammer the back of the arm, or pry it off with a wedge against the frame. The arm is held by thousands of pounds of press fit. Hammer blows land on the bearings and spindle sideways, and a pry bar levers against the bottom bracket cups or shell. In our assessment this risks a bent arm and a damaged bottom bracket to save an $18 to $22 tool.
- Two- or three-jaw gear pullers. Our view: the jaws hook the edges of the arm or the chainrings instead of the threads made for the job, and can bend a ring or crack an alloy arm.
The safe options: borrow a puller from a bike co-op or a friend, have a shop pull the arms, or buy one. Park Tool list prices, checked October 15, 2026: CWP-7 universal puller $17.95, CCP-22 (square taper) $21.95, CCP-44 (splined) $21.95. Match the tool to your bolt size from the table above.
Do I need to take the chain off?
Not for the left arm. For the drive-side arm, lift the chain off the chainrings and rest it on the bottom bracket shell, then guide the arm out past it.
Stuck crank or stripped puller threads
A stuck arm with good threads only needs more turns: Park says to keep turning the driver after you feel resistance until the arm comes off. Stripped threads are a different problem. Park Tool’s guidance runs from least to most destructive:
- Only the outer threads are damaged: clean the puller’s threads, start it straight, thread it in by hand as far as it goes, and tighten it into the arm with a wrench before you turn the driver. Park says it is worth trying even with a few threads left.
- Threads crossed or crushed: try a Bicycle Research TC-8. It is a fluted bolt that realigns damaged threads. It cuts no new threads and fits only square-taper arms with an 8 mm thread.
- Threads gone: Park considers the arm ruined. Either loosen the bolt three or four turns and ride hard uphill until the arm loosens (it will enlarge the hole, and the arm can drop off), or cut into the arm at the spindle with a hacksaw and split it with a cold chisel. Do not let the saw reach the spindle or the frame.
To avoid getting here, follow Park’s main warning: thread the puller body all the way in before you turn the driver.
Reinstall checklist
- Clean the spindle and the hole in the arm.
- Square taper: Park Tool says leave the taper dry and grease only the bolt threads and under the bolt head. Park’s exception: an arm that still creaks at full torque gets grease on the taper. Splined spindles (Octalink, ISIS, Hollowtech II, DUB): grease the splines.
- Set the arms 180 degrees apart before you tighten anything.
- Hollowtech II: tighten the cap only until side play is gone, push the stop plate back into place, then tighten the two pinch bolts in turns, a half turn each, to spec.
- SRAM DUB: torque the 8 mm bolt to 54 N·m, tap the drive-side arm with a mallet to seat it, then turn the preload adjuster toward the + sign until it stops and close it with the 2 mm bolt until its edges touch. SRAM says not to overtighten that bolt.
- Rock the arms side to side. Any play means it is not seated or the preload is off.
- Pedals: the left pedal threads in counterclockwise.
- Our rule: recheck a square-taper crank bolt after the first ride. Park Tool notes that a crank ridden with a loose bolt wears the taper until the arm has to be replaced.
Use the maker’s number, and the number printed on the arm where there is one. Our torque spec finder converts newton meters to inch-pounds if your wrench reads in in-lb.
| Crank and fastener | Torque | Source |
|---|---|---|
| Square taper or splined crank bolt, typical range | 34-50 N·m (300-450 in-lb), by brand | Park Tool |
| Shimano crank bolt (square taper, Octalink) | 34-44 N·m; Octalink XTR M15 bolt 40.3-49 N·m | Park Tool torque chart |
| Truvativ square taper / ISIS Drive bolt | 38-42 N·m / 43-47 N·m | Park Tool torque chart |
| Shimano Hollowtech II left arm pinch bolts (current road cranks) | 12-14 N·m, 5 mm hex | Shimano DM-TORQUE-00 |
| Shimano Hollowtech II cap (power-meter versions: mounting ring, TL-FC40) | 0.7-1.5 N·m, TL-FC16 or TL-FC18 | Shimano DM-TORQUE-00 |
| FSA MegaExo pinch bolts / cap | 9.8-11.3 N·m / 0.5-0.7 N·m | Park Tool torque chart |
| SRAM DUB crank arm bolt | 54 N·m (478 in-lb), 8 mm hex | SRAM DUB user manual |
| SRAM DUB self-extracting cap (reverse thread) | 14 N·m with a cap tool or 10 mm hex; hand tight with a spanner | SRAM DUB user manual |
| SRAM GXP crank bolt | 48-54 N·m (425-478 in-lb) | SRAM road crankset manual |
| Race Face crank bolt | 54 N·m | Park Tool torque chart |
| Shimano one-key release cap / Truvativ cap | 5-6.8 N·m / 12-14 N·m | Park Tool torque chart |
| Campagnolo Ultra-Torque central bolt | 42-60 N·m (372-531 in-lb), 10 mm hex | Campagnolo Ultra-Torque manual |
| Campagnolo Power-Torque bolt | Use the figure in Campagnolo’s manual for your model | Park gives none |
Park’s chart lists a wider Hollowtech II pinch bolt range (9.9-14.9 N·m) and a lower cap range (0.5-0.7 N·m) than Shimano’s current dealer manual. On a Shimano crank, go with Shimano’s figures above.
Before you pull the cranks
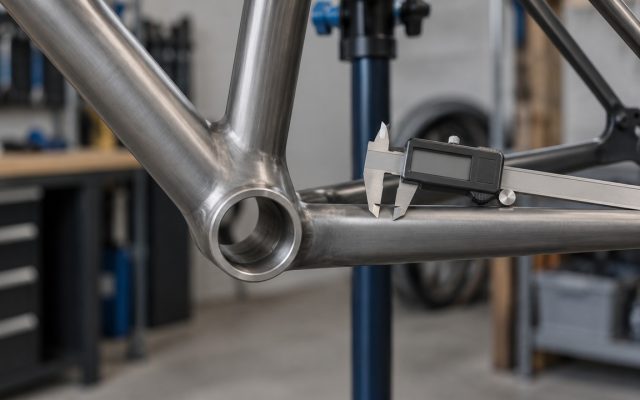
Chasing a creak? Make sure it follows your pedal stroke and not your wheel with our bike clicking noise guide. Park Tool says correct crank bolt torque usually stops a square-taper arm from creaking; only if it still creaks at full torque do you remove the arm and grease the pressed surfaces. Swapping to a different crank length? Find your range in the crank length calculator first. Replacing the bottom bracket while the arms are off? Measure the bottom bracket shell before you order, because the new crank and bottom bracket must match the frame and each other.
Sources
- Park Tool, How to Remove and Install a Crank: https://www.parktool.com/en-us/blog/repair-help/how-to-remove-and-install-a-crank
- Park Tool, Three-Piece Crank Removal and Installation: https://www.parktool.com/en-us/blog/repair-help/crank-removal-and-installation-three-piece
- Park Tool, Crank Removal and Installation: Two-Piece Compression Slotted: https://www.parktool.com/en-us/blog/repair-help/crank-removal-and-installation-two-piece-compression-slotted
- Park Tool, Crank Removal and Installation: Self-Extracting: https://www.parktool.com/en-us/blog/repair-help/crank-removal-and-installation-self-extracting
- Park Tool, Crank and Bottom Bracket Removal and Installation: Campagnolo Ultra-Torque: https://www.parktool.com/en-us/blog/repair-help/crank-bottom-bracket-removal-installation-campagnolo-ultra-torque
- Park Tool, Crank and Bearing Removal and Installation: Campagnolo Power Torque: https://www.parktool.com/en-us/blog/repair-help/crank-removal-and-installation-campagnolo-power-torque
- Park Tool, Removal of Cranks with Damaged Threads (Square Type Only): https://www.parktool.com/en-us/blog/repair-help/removal-of-cranks-with-damaged-threads-square-type-only
- Park Tool, One-Piece Crank and Bottom Bracket Service: https://www.parktool.com/en-us/blog/repair-help/bottom-bracket-service-one-piece
- Park Tool, Torque Specifications and Concepts: https://www.parktool.com/en-us/blog/repair-help/torque-specifications-and-concepts
- Shimano, Dealer’s Manual DM-TORQUE-00, Torque Chart (March 2023): https://si.shimano.com/en/pdfs/dm/TORQUE/DM-TORQUE-00-ENG.pdf
- SRAM, DUB Cranksets and Bottom Brackets user manual: https://docs.sram.com/en-US/publications/7unL17qdyCWxTL38aPmYJ0/UM%20-%20DUB%20Cranksets%20and%20Bottom%20Brackets
- SRAM, Road Cranksets and Bottom Brackets User Manual 95-6118-015 (2021): https://www.sram.com/globalassets/document-hierarchy/user-manuals/sram-road/drivetrain/road-cranksets-and-bottom-brackets-user-manual.pdf
- Campagnolo, Ultra-Torque 12s/13s Crankset Technical Manual, Rev. 08: https://media.campagnolo.com/seecommerce/original/C-FC-CHORUS-12S-TM1EN