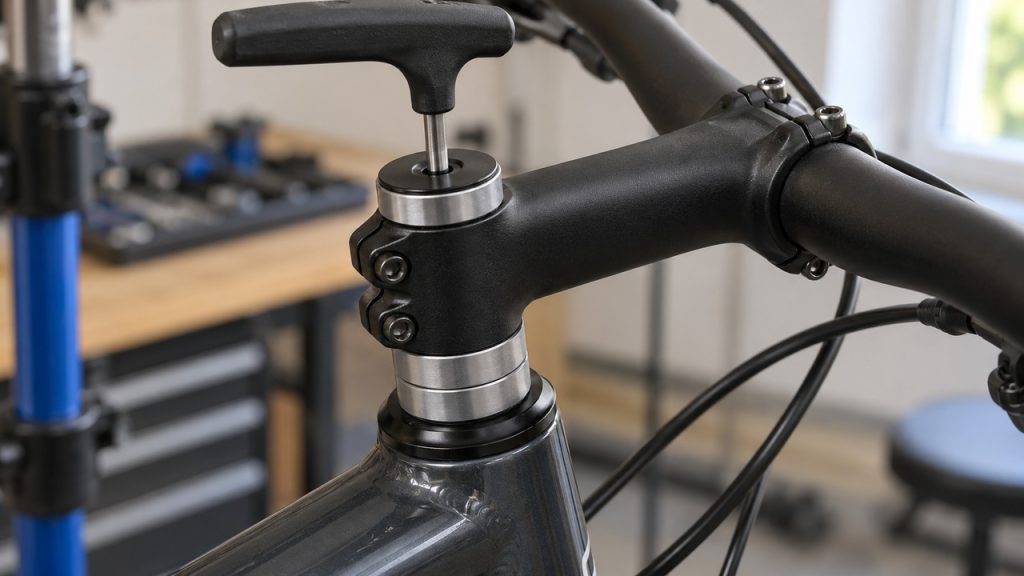
To raise bike handlebars on a modern threadless bike, move spacers from above the stem to below it, or flip an angled stem. Flipping a 100 mm, 6-degree stem from pointing down to pointing up lifts the bars about 20 mm and costs nothing. On an older bike with a quill stem, loosen the bolt on top of the stem, tap it down to free the wedge, and pull the stem up, but keep the minimum-insertion mark inside the frame. When those run out, a higher-rise stem, a riser bar or a steerer extender adds more height, each with its own limits.
Start by working out which stem you have, because the two systems raise in different ways and have different safety limits. The tables below give the rise in millimeters for each method, the limits fork makers publish, and the torque values you’ll need when you tighten everything back up.
Threadless or quill? Check this first
Look at the top of the stem. A threadless stem clamps around the outside of the fork’s steerer tube with 1 to 3 pinch bolts, has spacer rings under it, and has a cap with a bolt on top of the steerer. A quill stem slides down inside the steerer, has one bolt in its top, and sits on a large threaded locknut. Park Tool notes that quill stems turn up on many older bikes and some inexpensive bikes.
| What you see | Threadless stem | Quill stem |
|---|---|---|
| Bolt on top | A cap bolt on the top of the steerer, with a round cap under it | One long bolt in the top of the stem body that runs down to a wedge or cone |
| Bolts on the side | 1 to 3 pinch bolts on the back of the stem that clamp the steerer | None on the steerer. The only side bolts clamp the handlebar. |
| Below the stem | Spacer rings, then the headset’s top cover | A large hex locknut and a threaded race |
| How it raises | Spacers, flipping, or a different stem, bar or extender | Slides up inside the steerer until it reaches the minimum-insertion mark |
| Common sizes (Park Tool) | Steerers of 1, 1 1/8, 1 1/4 and 1 1/2 in | Quills of 22.2, 25.4 and 28.6 mm |
Many e-bikes and hybrids add a third option: an adjustable stem with a hinge and an angle bolt. If yours has one, loosen the angle bolt, tilt the stem up, and tighten the bolt to the value printed on the stem. It’s the quickest change on the list.
Six ways to raise handlebars, with the rise in mm
The rise figures below are Icebike math for a frame with a 73-degree head tube, a typical road value. Hybrids and mountain bikes run slacker. On a 69-degree head tube, the figures drop by 1 mm or less for spacer moves and flips up to 10 degrees. On a 65-degree mountain bike head tube, a 17-degree flip of a 100 mm stem comes out about 3 mm lower than the table. Work down the table in order: the first two cost nothing.
| Method | Fits | Typical rise | Cost | Main limit |
|---|---|---|---|---|
| Move spacers under the stem | Threadless, with spacers above the stem | About 4.8 mm per 5 mm spacer; 9.6 mm per 10 mm | Free | Only the spacers already above the stem. The fork maker’s maximum stack still applies. |
| Flip the stem | Threadless stem with a 6 to 17 degree angle, fitted pointing down | 100 mm stem: 20 mm at 6 degrees, 23 mm at 7, 56 mm at 17 | Free | The bars also come back 6 to 17 mm. A 0-degree stem gains nothing. |
| Higher-rise or adjustable stem | Threadless (adjustable versions exist for both systems) | 100 mm at -6 degrees to 100 mm at +17: about 37 mm. To 90 mm at +35: about 52 mm. | Price of a stem | Steep stems pull the bars back 15 to 43 mm, and may need longer cables. |
| Riser bar | Flat-bar bikes | Close to the bar’s listed rise, which the maker prints in its specs | Price of a bar, plus grips | Drop-bar bikes would need flat-bar brake levers and shifters to switch. |
| Steerer extender | Threadless with an aluminum or steel steerer | The most of any method; the maker lists the added height | Price of the extender | Not on a carbon steerer (Icebike’s reading of fork limits). Needs enough bare steerer to clamp. |
| Raise the quill stem | Quill stems | Everything above the minimum-insertion mark | Free | The mark must stay inside the frame. A stuck quill needs freeing first. |
How to raise handlebars by moving spacers
If spacers sit above your stem, you can move them below it. Each 10 mm spacer you move lifts the bars 9.6 mm and moves them 2.9 mm closer to you on a 73-degree head tube, because the steerer leans back. Skip this if the top of the stem sits flush with the top cap and no spacers ride above it: the steerer was cut to length, and moving spacers under the stem would leave the stem clamping on air.
Check the routing first. On many current road and gravel bikes, brake hoses and shift cables run through the spacers and the headset cover into the frame. Those spacers can’t slide off over the hoses. Moving them takes split spacers made for that frame, or disconnecting the brake hoses and bleeding the brakes afterward. Read the frame maker’s manual for your model; for most riders this is a shop job.
- Strap or zip-tie the handlebar to the top tube so the cables and hoses don’t kink when the stem comes off.
- Loosen the stem’s pinch bolts about one full turn, as Park Tool describes.
- Hold the fork, or tie it to the frame if the bike is in a stand. Park Tool warns that the top cap is the only thing holding the fork in once the pinch bolts are loose.
- Remove the top cap bolt and cap, then slide the stem, with the bars still attached, off the steerer.
- Move the spacers you want from the top of the stack to below the stem, then slide the stem back on and put the remaining spacers on top.
- Check the gap. Park Tool says the stem or top spacer should sit about 3 mm above the top of the steerer. If they sit flush with or below it, the top cap can’t adjust the headset.
- Fit the cap, snug the bolt, set the headset, line up the bars, and torque the pinch bolts (see the checklist).
The same steps lower the bars: move spacers from below the stem to above it. Once you’ve ridden the new height for a few weeks and it suits you, a shop can cut the steerer to remove extra spacers above the stem, within your fork maker’s rules.
Forum threads on this question suggest loosening the top cap and lifting the stem a few millimeters without adding a spacer. Don’t. Park Tool’s procedure requires every part to be fully seated with no gaps before you adjust the headset. With a gap under the stem, the top cap can’t press the headset together, so you can’t adjust out bearing play.
Flip the stem: how much it raises the bars
Most threadless stems come with an angle of 0 to 20 degrees, per Park Tool. A stem fitted pointing down (negative) can turn over to point up (positive). The bars rise by about twice the stem’s own rise.
Icebike math. Rise = stem length x [sin(new angle) – sin(old angle)], with each angle measured from horizontal. On a real bike, the angle from horizontal is the stem angle plus (90 minus the head-tube angle), because the steerer leans back. For a flip, that simplifies to: rise = 2 x stem length x sin(stem angle) x sin(head-tube angle). A 100 mm, 6-degree stem on a 73-degree head tube: 2 x 100 x 0.1045 x 0.9563 = 20.0 mm. The same flip pulls the bars back by 2 x 100 x 0.1045 x cos(73) = 6.1 mm.
| Stem length | 6 degree flip | 7 degree flip | 10 degree flip | 17 degree flip |
|---|---|---|---|---|
| 80 mm | 16 mm up, 5 mm back | 19 mm up, 6 mm back | 27 mm up, 8 mm back | 45 mm up, 14 mm back |
| 90 mm | 18 mm up, 6 mm back | 21 mm up, 6 mm back | 30 mm up, 9 mm back | 50 mm up, 15 mm back |
| 100 mm | 20 mm up, 6 mm back | 23 mm up, 7 mm back | 33 mm up, 10 mm back | 56 mm up, 17 mm back |
| 110 mm | 22 mm up, 7 mm back | 26 mm up, 8 mm back | 37 mm up, 11 mm back | 62 mm up, 19 mm back |
| 120 mm | 24 mm up, 7 mm back | 28 mm up, 9 mm back | 40 mm up, 12 mm back | 67 mm up, 21 mm back |
Icebike math for a 73-degree head tube. Stem length runs from the center of the steerer to the center of the bar.
To flip it, strap the bars, take out the faceplate bolts, then loosen the pinch bolts and remove the top cap as in the spacer steps. Turn the stem over, refit it, and put the bar back in the clamp. Park Tool says to thread the faceplate bolts in evenly so the gap above and below the bar matches, then tighten them in an X pattern. Set bar roll and centering before final torque; many bars have centering marks. Skip this if your bike has a one-piece bar and stem, or hoses and cables routed through the stem or headset. Those fit one way, and changing them often means disconnecting the hoses and bleeding the brakes.
Fit a higher-rise or adjustable stem
A new stem gives more height than a flip, but a steep one also pulls the bars toward you. Swapping a 100 mm, -6 degree stem for a 100 mm, +17 degree stem lifts the bars about 37 mm and shortens reach about 15 mm (Icebike math, 73-degree head tube). Going to a 90 mm, +35 degree stem lifts them about 52 mm and shortens reach about 43 mm. Those reach changes alter how the bike steers and how your back and shoulders load.
Before you buy, match the steerer diameter and the bar clamp diameter. Park Tool lists bar clamps of 22.2, 25.4, 26.0, 31.8 and 35 mm, and some differ by fractions of a millimeter, so measure with a caliper or read the size engraved on the old stem. Park also notes that large changes in stem length or angle may need longer cable housing.
Adjustable stems hinge at the front or back and lock with an angle bolt. Trek’s owner’s manual says to tighten and torque the angle bolt again whenever you loosen it. They suit a rider still finding a position. Once you know the angle you like, a fixed stem weighs less and has fewer bolts to check.
Fit a riser bar
On a flat-bar bike, a riser bar lifts the grips by close to its listed rise without touching the stem or headset. Swapping a flat bar for a 30 mm riser raises your hands about 30 mm. Most riser bars also sweep back, which brings the grips closer as well. Choose the width with our handlebar width calculator, and check that the clamp diameter matches your stem.
Skip this if you ride drop bars. Moving a road bike to a riser bar means new brake levers and shifters made for flat bars, and that costs more than a new stem.
Steerer extenders: the most height, the most caveats
An extender is a short tube that clamps onto the top of your steerer and gives the stem a new, higher steerer to clamp. It adds more height than any other method here. Before you buy, check two numbers in the maker’s instructions: the added height, and the minimum length of bare steerer the extender needs to clamp onto. If your steerer was cut short, it may not have enough.
Icebike’s reading of the fork manuals: don’t fit one to a carbon steerer. None of the carbon fork guide Icebike read mentions extenders, and Specialized’s guide caps the spacer stack at 40 mm and requires its own expander plug inside the steerer, with a warning against star nuts. An extender puts the stem higher than that 40 mm stack allows. On an alloy steerer, read your fork manual first: if it caps the spacer stack, as FOX (30 mm) and Specialized (40 mm) do, an extender works against that limit. Check every cable and hose at full lock, because a lift that large can pull a brake hose tight.
How to raise a quill stem
A quill stem raises until its minimum-insertion mark reaches the top of the headset locknut. The mark printed on your stem governs. U.S. federal rules (16 CFR 1512.6) require makers to place that mark at least 2.5 times the stem’s diameter from the lowest point of the stem. So a stem keeps at least 55.5 mm inside the frame for a 22.2 mm quill, at least 63.5 mm for 25.4 mm, and at least 71.5 mm for 28.6 mm (Icebike math from the federal rule). Use those floors only when the mark has worn off, and treat them as minimums, not targets. Some stems also carry a maximum-height mark. Park Tool’s rule covers both: don’t go above the maximum height or past the minimum-insertion mark.
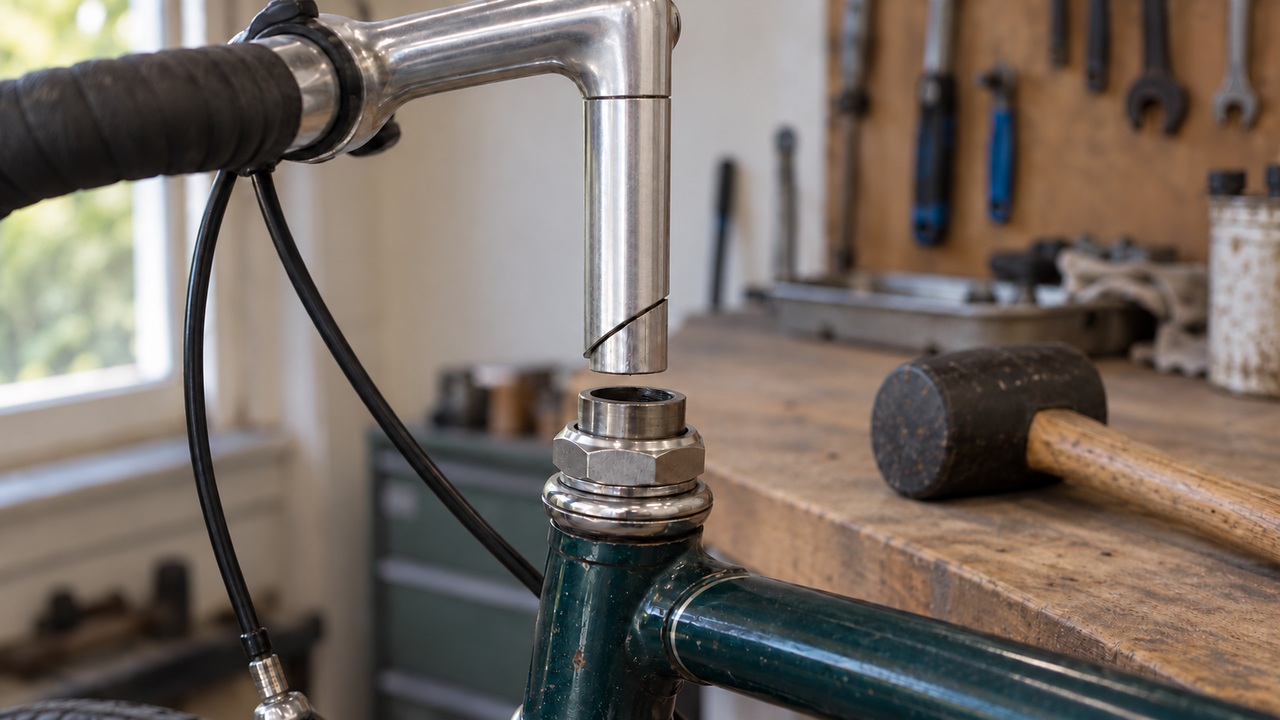
- Photograph the bar angle and note where the bars point, so you can match them later.
- Loosen the bolt on top of the stem about two turns, as Park Tool directs.
- The wedge or cone inside tends to stay locked. Tap the bolt head down with a mallet (Park uses a mallet and punch) until the stem turns freely.
- Pull the stem up to the height you want. If you see the minimum-insertion mark above the locknut, push it back down until the mark disappears.
- Line the bars up with the front wheel. A ruler held against the fork legs helps.
- Tighten the top bolt to the value printed on the stem. Park Tool lists 16-18 Nm as a generic range for quill bolts and 19.6-29.4 Nm for Shimano.
If the stem hasn’t moved in years, take it out, clean it, and grease the quill, the wedge, the bolt and the inside of the steerer before you refit it. Park Tool and Trek’s manual both call for that grease on quill stems. If the stem still won’t budge after you free the wedge, stop: a seized aluminum quill in a steel steerer needs more than a mallet, and Park Tool covers that job in its seized seatpost and stem guide (listed in the sources). Skip the raise if the mark already sits at the locknut. A taller quill stem or a quill-to-threadless adapter with a higher stem is the next step.
Spacer and insertion limits by maker
The fork maker sets the spacer limit, not the stem maker or the shop. These are the published figures Icebike found. Where makers disagree, follow the manual for your fork.
| Source | Fork or stem | Spacers under the stem | Spacers above the stem | Steerer top |
|---|---|---|---|---|
| Specialized | Specialized carbon forks | Maximum 40 mm (1.5 in) | Don’t leave them there permanently | Mark it level with the top of the stem, then cut 3 mm lower (2 mm on alloy) to fit the plug |
| Trek | All stems on Trek bikes | At least one 5 mm spacer; maximum in the fork manual | One spacer above and one below on carbon steerers | Not stated on the stems page |
| FOX | FOX suspension forks | Maximum 30 mm | Not stated | Don’t cut more than 3 mm below the top part |
| Park Tool | General threadless practice | Not stated | Required on top of the stem on carbon steerers | About 3 mm below the top of the stem or top spacer; on carbon, the steerer runs all the way through the stem |
| 16 CFR 1512.6 | Quill stems sold in the U.S. | n/a | n/a | Insertion mark at least 2.5 x stem diameter from the lowest point of the stem |
| Other brands | Canyon, Giant, Cannondale, RockShox and others | Icebike didn’t find a published figure on a public spec page. Read the fork’s own manual before you add stack. | ||
Note the conflict on carbon: Park Tool and Trek both call for a spacer on top of the stem. Specialized says not to leave spacers above the stem permanently, because they defeat its expander plug’s support of the steerer and stem. Use the rule for the fork you own.
Torque values for stem bolts
Use the number printed on your stem. Trek’s manual says makers print it there, and that figure beats any chart. When the stem gives none, these are the published figures.
| Bolt | Published value | Source |
|---|---|---|
| Threadless pinch bolts (steerer clamp) | Typical 4-6 Nm. Thomson 5.4 Nm, Race Face 6.2 Nm, Deda 8 Nm, FSA carbon 8.8 Nm. | Park Tool |
| Stem torque on a Specialized carbon steerer | No more than 9.0 Nm, raised in 0.56 Nm steps in an alternating pattern | Specialized |
| Faceplate bolts (bar clamp) | Typical 4-6 Nm. Thomson 5.4 Nm, Time 6 Nm, Race Face 6.2 Nm, Deda magnesium 8 Nm. | Park Tool |
| Quill stem top bolt (wedge) | Generic 16-18 Nm; Shimano 19.6-29.4 Nm | Park Tool |
| Top cap bolt | No torque figure. Snug it until the bearing play is gone and the bars still turn freely. | Park Tool |
For other cockpit bolts, the bike torque spec finder gives typical ranges by part and material. Don’t put grease or carbon paste between the stem and a carbon steerer: Trek and Specialized both warn against it.
Check the rise before you buy a stem
Enter your current stem and the one you’re considering. Set the head tube angle box to your frame’s figure from the maker’s geometry chart (it starts at 73 degrees). Enter stem angles as printed on the stem: positive when it points up, negative when it points down. A 100 mm stem flipped from -6 to +6 on a 73-degree head tube shows +20.0 mm of bar height and -6.1 mm of reach, the same as the flip table. The spacer box moves the stem along the steerer, so 20 mm of spacers shows +19.1 mm of height and -5.8 mm of reach.
Bike Stem and Spacer Calculator
Estimate handlebar height and reach changes from stem length, stem angle, head tube angle and spacer moves.
If you’re comparing whole setups, the bike fit comparison tool adds frame stack and reach to the stem and spacers. The same stem calculator also lives on our stem length calculator page.
Safety checklist after any handlebar height change
- Headset preload. Before you tighten the pinch bolts, snug the top cap until you feel slight resistance and the bars still turn freely. Park Tool backs it off 1/8 turn if steering feels sticky.
- Play check. Snug the pinch bolts, hold the front brake, and rock the bike. A knock at the top of the head tube means play: loosen the pinch bolts, add 1/8 turn to the top cap, and check again.
- Steerer and spacers. The steerer sits about 3 mm below the top of the stem or top spacer, and on carbon it runs through the full height of the stem clamp.
- Quill mark. The minimum-insertion mark is out of sight inside the frame.
- Bolt torque. Pinch bolts and faceplate bolts at the value printed on the stem, in an alternating or X pattern.
- Bars straight. The bar sits square to the front wheel and centered in the clamp.
- Cable and hose length. Turn the bars to full lock both ways. No brake cable, hydraulic hose, shift housing or e-bike display cable pulls tight, kinks or moves the brake lever. A short hydraulic hose means a longer hose and a brake bleed.
- Brakes. Squeeze both levers. They feel the same as before you started.
- Test ride. Ride slowly in a quiet place, then recheck bolt torque after the first ride.
How high should your handlebars be?
Icebike’s starting point, not a fit rule: for commuting, touring and relaxed riding, set the top of the bar level with the top of the saddle or a little above it. For fast road riding, start lower than the saddle and raise the bar if your neck, hands or lower back complain. Measure both heights from the floor with the bike level. Raise in steps of 10 to 20 mm and ride a week between changes.
Icebike’s rule of thumb: if you still need more than 40 mm after the spacers and a flip, the frame may be too small or too long for you. Our frame size guide and the stack and reach comparison tool show whether a different frame would fit better than a taller cockpit.
Handlebar height questions
Can you raise handlebars without a new stem?
Yes, if you have spacers above the stem, an angled stem pointing down, an adjustable stem, or a quill stem set below its mark. Those four cost nothing. If the stem sits at the top of the steerer and already points up, you need new parts.
Does flipping the stem raise the handlebars?
Yes, when the stem has an angle and you fit it pointing down now. A 100 mm, 6-degree stem gains about 20 mm. A 0-degree stem stays at the same height whichever way up it goes.
How high can handlebars go?
Your fork sets the practical limit through its steerer length and spacer cap. For new bikes sold in the U.S., 16 CFR 1512.6 also limits the bar ends to 406 mm (16 in) above the seat with the seat at its lowest and the bars at their highest.
When should a shop do it?
Take it in if the steerer is carbon and you’re unsure of the limits, if a quill stem won’t move after you free the wedge, if a hydraulic hose comes up short, or if you don’t own a torque wrench that reads 4-6 Nm.
Sources
- Park Tool. Stem Removal & Installation: Threadless (January 30, 2019, updated June 6, 2023; accessed October 15, 2026). Pinch and faceplate bolts, 3 mm steerer gap, carbon steerer through the stem with a spacer on top, headset adjustment order, typical 4-6 Nm, stem angles 0-20 degrees, housing length.
- Park Tool. Stem Removal & Installation: Quill Stems (January 30, 2019; accessed October 15, 2026). Wedge or cone, quill diameters, minimum-insertion and maximum-height marks, mallet and punch, grease points.
- Park Tool. Torque Specifications and Concepts (accessed October 15, 2026). Stem binder, steerer clamp and faceplate torque by brand.
- Park Tool. How to Adjust a Threadless Headset (accessed October 15, 2026).
- Park Tool. Seized Seatposts and Stems (accessed October 15, 2026).
- Specialized. Instruction Guide: Specialized Carbon Forks (IG0298 R6, accessed October 15, 2026). 40 mm spacer limit, spacers above the stem, carbon plug, 9.0 Nm maximum stem torque on the steerer, no carbon paste.
- Trek. Owner’s Manual: Stems (accessed October 15, 2026). 5 mm spacer below, spacers above and below on carbon, torque printed on the stem, quill insertion line, angle bolt, no grease on the stem-steerer joint.
- FOX. Fork: General Information and Installation Guide (accessed October 15, 2026). 30 mm spacer limit, 3 mm steerer cut rule.
- U.S. Code of Federal Regulations. 16 CFR 1512.6, Requirements for steering system (accessed October 15, 2026). Quill insertion mark at 2.5 x stem diameter, 406 mm bar-end height limit.