To fix a flat bike tire, take the wheel off, lever one side of the tire off the rim, pull out the tube and find the hole. Then find what made it before you fit anything new: run your fingers around the inside of the tire and remove the thorn, glass or wire still stuck in it. Fit a spare tube at the roadside and patch the punctured one at home, or patch it on the spot if you carry no spare.
Skip the cause check and the same sharp point can flatten the new tube before you get home. If you have no tools with you, read whether to ride or walk a flat tire home first. Replacing a worn tire uses the same steps, plus the short tire-swap section after Step 2.
Tools for fixing a flat
You need three things to fix most flats: two tire levers, a spare tube or a patch kit, and a pump that fits your valve. The lever method below uses two at once, so carry at least two. Add a 15 mm wrench if your wheels bolt on with axle nuts; that is the typical size.
| Item | Carry on the bike | Keep at home | Why |
|---|---|---|---|
| Tire levers (2 or 3) | Yes | Yes | Plastic levers lift the bead without scarring the rim. Schwalbe says not to use metal levers. |
| Spare tube in your size and valve type | Yes | Yes | The fastest roadside fix. Match the size printed on the tire sidewall. |
| Patch kit | Glueless | Vulcanizing | Glueless patches need no drying time; vulcanizing patches make the lasting repair. |
| Mini pump or CO2 inflator | Yes | No | Must fit your valve (Presta, Schrader or Dunlop). |
| Floor pump with gauge | No | Yes | Gets you to the pressure range on the sidewall and shows the number. |
| Tire boot | Yes | No | Covers a cut in the tire casing so the tube can’t bulge through it. |
| 15 mm wrench | Only with axle nuts | Yes | Removes nutted wheels. Quick-release and thru-axle wheels need no wrench. |
| Rag and bowl of water | No | Yes | The rag wipes the inside of the tire; the water shows bubbles from a slow leak. |
Check the tube size before you buy a spare. The tire sidewall carries a size such as 700x32c or 29×2.4, and the tube box lists the range of widths it fits. If your tire shows an ISO/ETRTO number (for example 32-622), our bike tire size converter translates it into the inch and French sizes on tube boxes.
Step 1: Remove the wheel
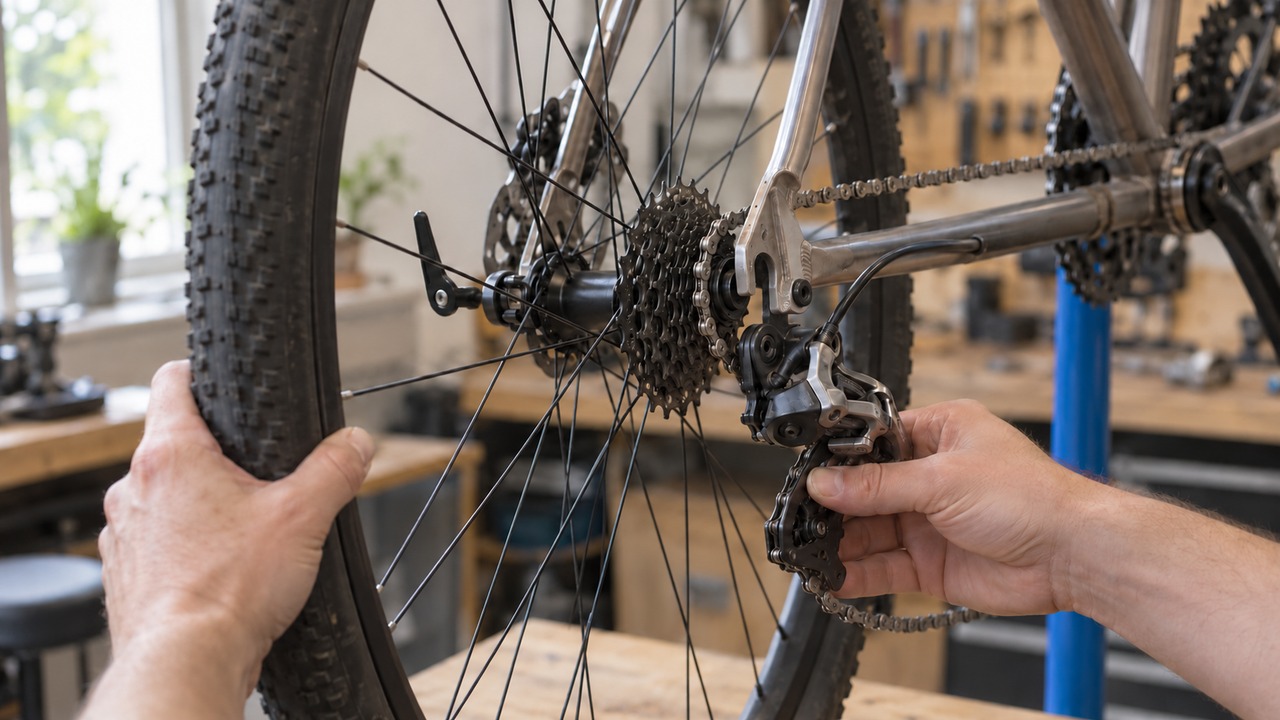
Let the air out, open the rim brake if you have one, and release the axle. Before you take a rear wheel out, shift to the smallest rear cog and the smallest front chainring, which gives the chain the most slack.
Quick-release wheels
Pull the skewer lever outward to open it. If the wheel won’t drop out past the small tabs on the fork ends, unscrew the nut on the opposite side a few turns. On reinstall, Park Tool’s rule for clamping force: the lever should start to meet resistance at 90 degrees from the frame, then you push it fully closed. Close the front lever just ahead of the fork blade and the rear lever between the chainstay and seatstay.
Thru-axle wheels
Thru-axles thread into the frame or fork. Some levers pull outward first and then turn; others turn like a long bolt. Unscrew the axle counterclockwise, slide it out, and drop the wheel. To refit, slide the axle through and turn it clockwise until tight.
Nutted (bolt-on) wheels
Loosen both axle nuts with a 15 mm wrench and drop the wheel out. Tighten them to the bike maker’s torque on reinstall. As a rough guide from Park Tool, 25 N·m is about 40 lb of pull on the end of a 5 inch wrench. If a nut has teeth or knurling on its washer face, those face the dropout.
Rear wheel with a derailleur
Shift to the smallest cog, then pull the rear derailleur body back so the cassette can drop out of the chain. Switch a clutch derailleur off first: on Shimano, flip the on/off lever; on SRAM, rotate the cage forward and press the lock button. Lay the bike on its left side, not upright on the derailleur.
Disc brakes: don’t squeeze a hydraulic brake lever while the wheel is out. The pads close together and the rotor won’t slide back in. A pad spreader pushed between the pads opens them again.
Step 2: Remove the tire with levers
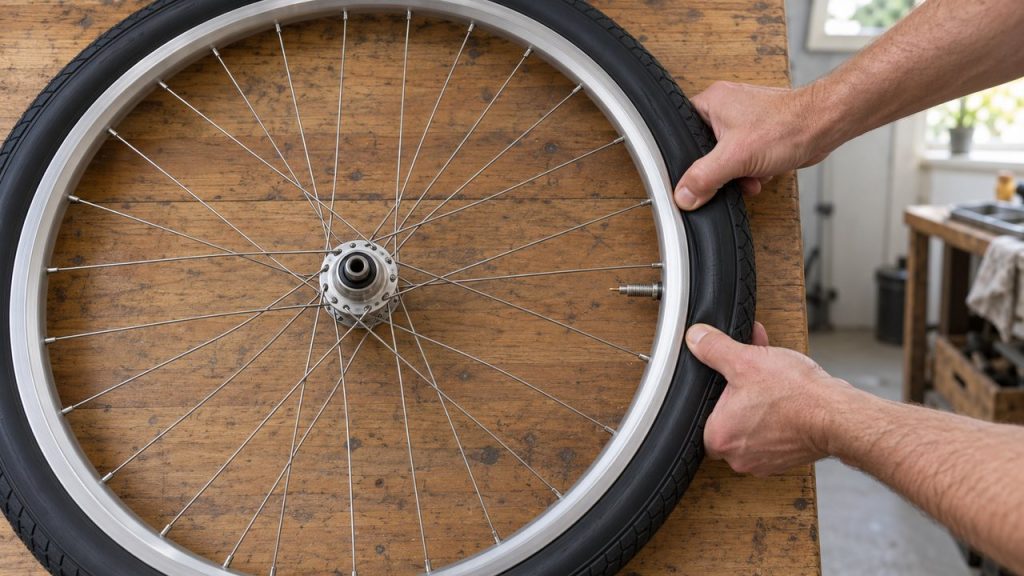
Let all the air out first: unscrew the Presta tip and press it, or press the Schrader pin. Push both tire beads toward the center of the rim all the way around. The center channel is the smallest diameter, and that slack makes the next step easier.
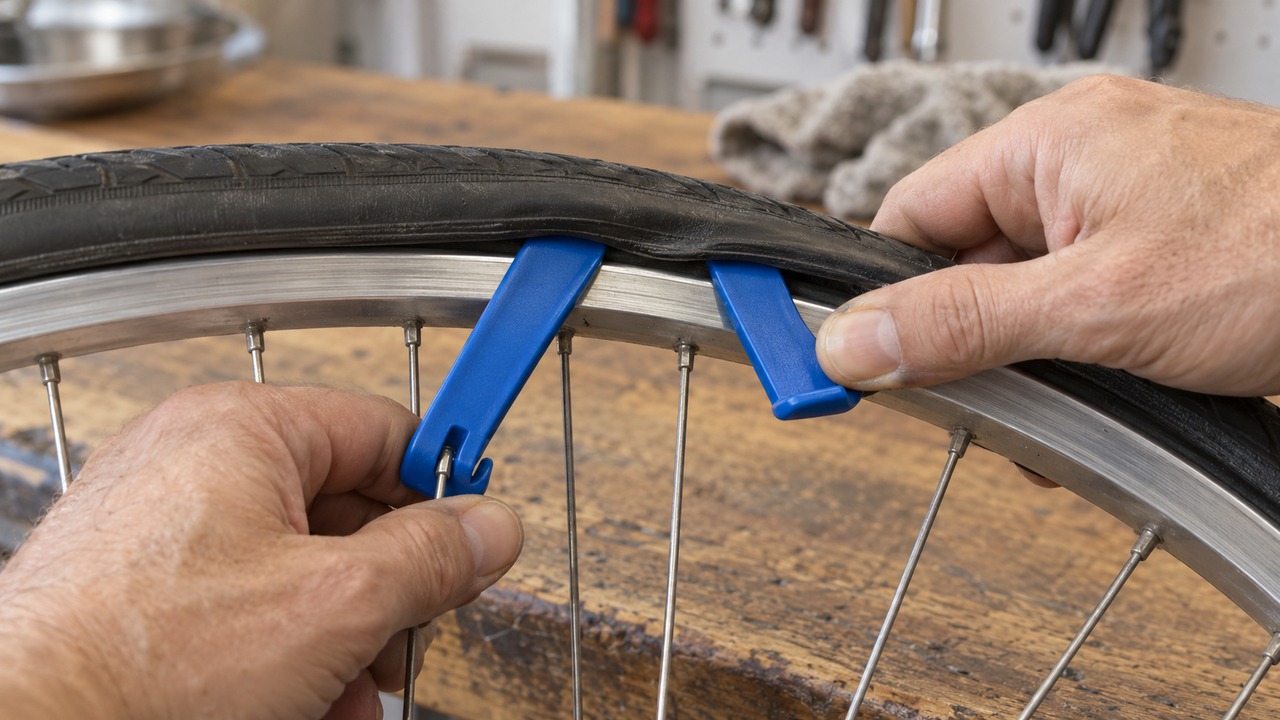
- Start opposite the valve. Hook two levers under the tire bead about 25-50 mm (1-2 in) apart.
- Pull both levers down toward the spokes to lift a section of bead over the rim wall. Most levers have a hook that clips onto a spoke and holds the first one in place.
- Move the free lever about 5 cm along the rim and pry again. Once the bead loosens, slide that lever around the rim to free the whole side.
- Pull the tube out, starting opposite the valve, and push the valve up out of its hole last.
Leave the second bead on the rim if you are only replacing the tube. This video from Park Tool shows the whole removal and refit, levers included:
Changing the tire itself
Replace the tire when the casing is cut, bulging or showing threads. A new tire goes on with the same steps as a tube, plus four checks:
- Lever the second bead off as well, then lift the old tire away from the rim.
- Match the new tire’s ISO bead diameter to the old one: 622 for 700c and 29 in, 584 for 650b and 27.5 in, 559 for 26 in mountain bikes. The size converter decodes the sidewall if the numbers differ.
- Check the rim tape before the new tire goes on. Schwalbe says it must cover every spoke hole.
- Find the direction arrow on the sidewall, if there is one, and fit the first bead onto the rim by hand so the tire rolls that way. Then put the tube in and carry on at Step 5.
Step 3: Find the cause before you fit a new tube
Pump the old tube up to about twice its normal width, then listen and feel for air while you turn it close to your ear or lips. If you hear nothing, dunk it in water and watch for bubbles. Mark the hole with four marks around it, set back from the hole so sanding won’t rub them off.
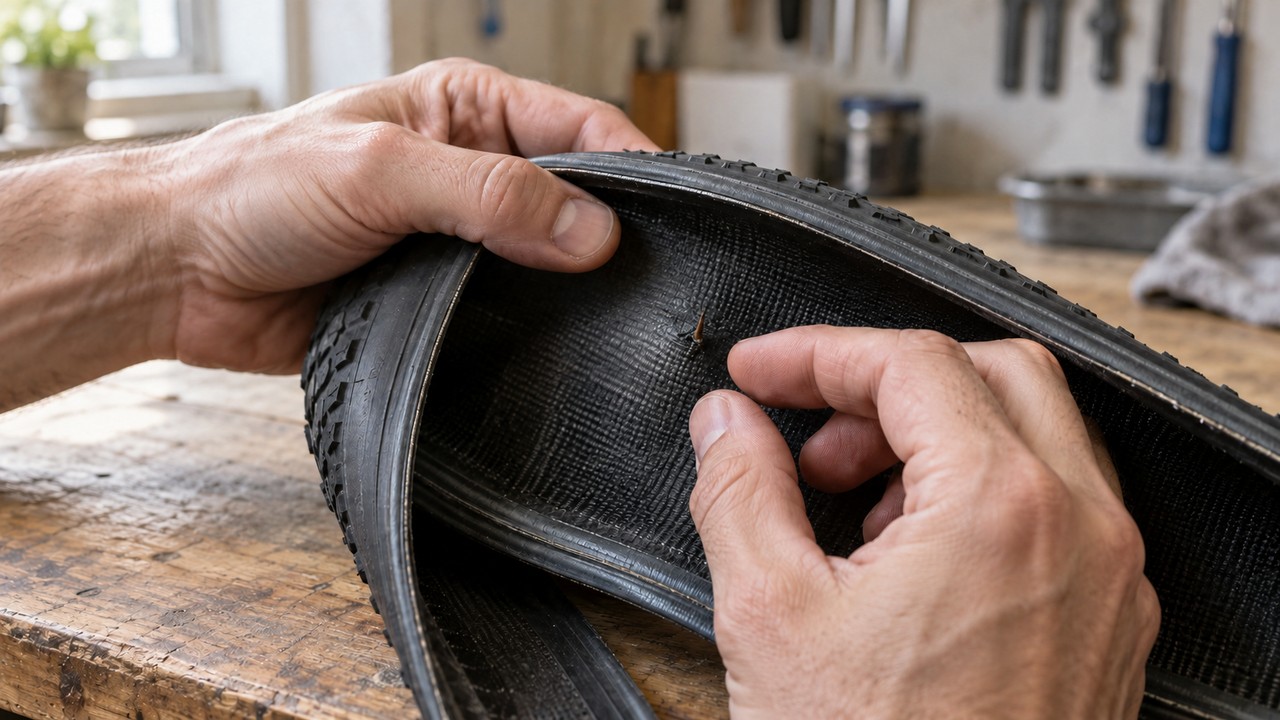
Now lay the tube against the tire with the valve beside the valve hole. The hole in the tube points to the spot in the tire to check. Wipe the inside of the casing with a rag, then run your fingertips around it in both directions. A thorn or wire end can sit flush on the outside and still poke through on the inside. Pull anything you find out with a fingernail or pliers, not your fingertip.
A single hole on the tread side means the object is often still in the tire at that spot. Two short slits side by side mean a pinch flat, where the tube got trapped against the rim on a hit; pump the next tube higher, inside the range on the sidewall. For rim-side holes, valve tears and flats that keep coming back, our guide to why your bike tire keeps popping matches each kind of tube damage to its cause and fix.
Check the tire casing too
A cut you can see daylight through, a bulge, or exposed threads mean the tire needs replacing. At the roadside, a tire boot stuck inside the casing over the cut gets you home. Park Tool calls its TB-2 boot a temporary fix and says to replace the tire as soon as possible.
Patch or replace the tube?
Replace the tube at the roadside and patch the old one at home. Sheldon Brown calls a tube swap often the quickest repair, and a vulcanized patch done at a bench makes the old tube a good spare. Patch on the road when you have no spare or a second flat.
| Fix | Works on | Where to do it | Lasting repair? | Won’t fix |
|---|---|---|---|---|
| New tube | Any tube flat | Roadside or home | Yes | A cut tire casing (boot or replace the tire) |
| Vulcanizing patch kit (glue, for example Park VP-1) | Butyl and latex tubes. Not TPU, not tubeless tires. | Home, or roadside if you can wait for the glue | Yes. Park Tool describes a durable, permanent repair. | Valve-base tears, long tears |
| Glueless patch (for example Park GP-2) | Butyl and TPU tubes. Not latex, not tubeless. | Roadside | No. Park Tool calls it a temporary fix: replace the tube as soon as possible. | Valve-base tears, long tears |
| Schwalbe Glueless Patches for Aerothan | Schwalbe’s TPU tubes only. Schwalbe says they don’t suit butyl tubes. | Roadside or home | Schwalbe sells them as the repair for Aerothan tubes | Holes over 4 mm. Schwalbe repairs cuts up to 4 mm with two overlapping patches. |
| Tire boot | A cut in the tire casing | Roadside | No. Temporary. | The tube itself: you still need a patch or new tube |
Tube compatibility in the table comes from the makers’ product specifications. Skip patching if the hole runs longer than your largest patch can cover with a margin. A tube torn at the valve base needs replacing too: Icebike’s rule, since a flat patch can’t seal around the thick rubber foot of the stem. Schwalbe traces most valve tears to the tire slipping on the rim and dragging the tube, often at low pressure.
Step 4: How to patch a bike tube
Patch kits differ, so follow the sheet in your kit when its times differ from these. The steps below follow the VP-1 and GP-2 instruction sheets.
Vulcanizing patch (glue kit)
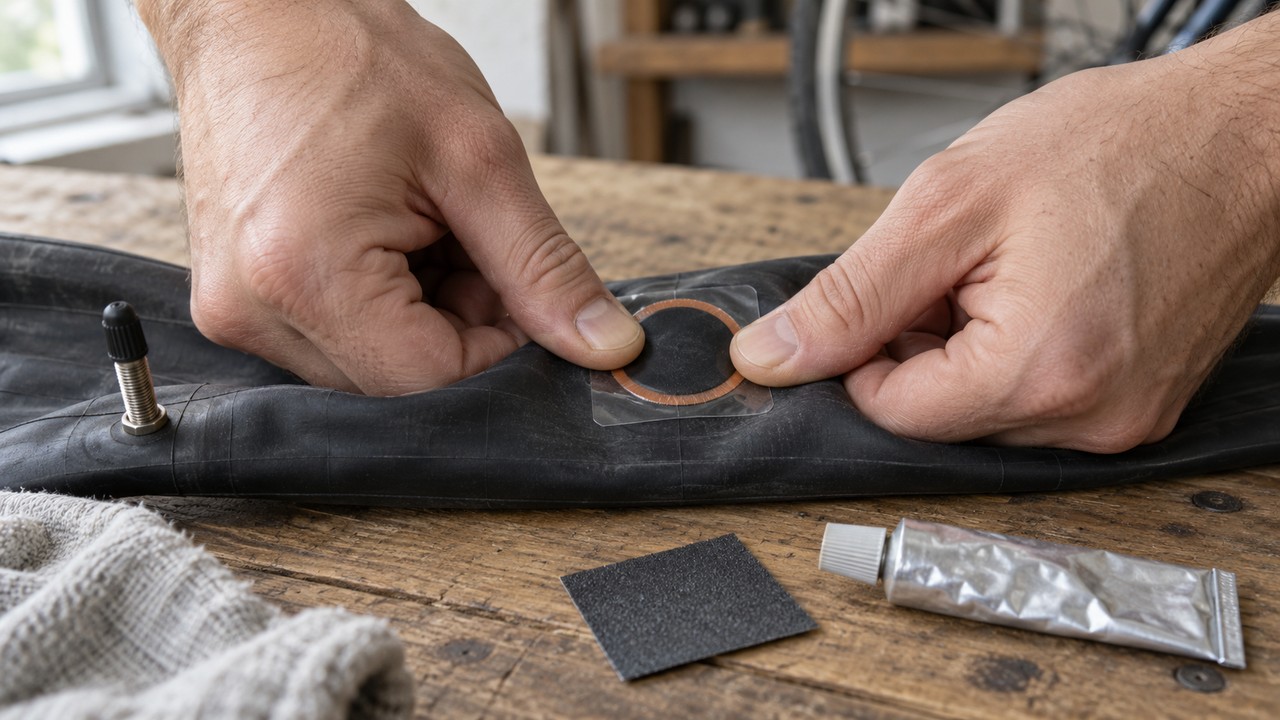
- Lightly sand an area bigger than the patch around the hole. Heavy sanding can groove the rubber and make the patch fail.
- Spread a thin layer of glue over an area larger than the patch. Don’t pile it on.
- Let the glue dry. Park Tool says this may take several minutes. Test only the outer edge of the glue with a fingertip, not the middle where the patch goes. Sheldon Brown’s rule: make sure the cement has dried completely.
- Peel the foil off the patch without touching its face, center it over the hole and press it firmly onto the tube, especially at the edges. Hold the pressure for over a minute if you can.
- Check that the edges have bonded. Leave the clear plastic cover on. If you peel it off, dust the patch with talc so it won’t stick to the inside of the tire.
Opened glue tubes dry out once you puncture the seal, so check your saddlebag kit before you rely on it.
Glueless patch
- Make sure the tube is clean and dry.
- Scuff it lightly with the kit’s sandpaper. Schwalbe’s Aerothan patches are the exception: Schwalbe says not to roughen the tube before fitting them.
- Peel the backing, center the patch over the hole and press it firmly, rolling the tube between your thumbs and fingers.
Don’t test a glueless patch by inflating the tube outside the tire; Park Tool says that can weaken the bond. Fit it and inflate it inside the tire. The patch video covers both kit types:
Step 5: Install the tube without pinching it
A new tube usually fails at this step in one of two ways: it gets caught under the bead, or a lever nips it against the rim. Fit the tire by hand as far as it will go. Sheldon Brown warns that levers on reinstall are very likely to pinch the tube.
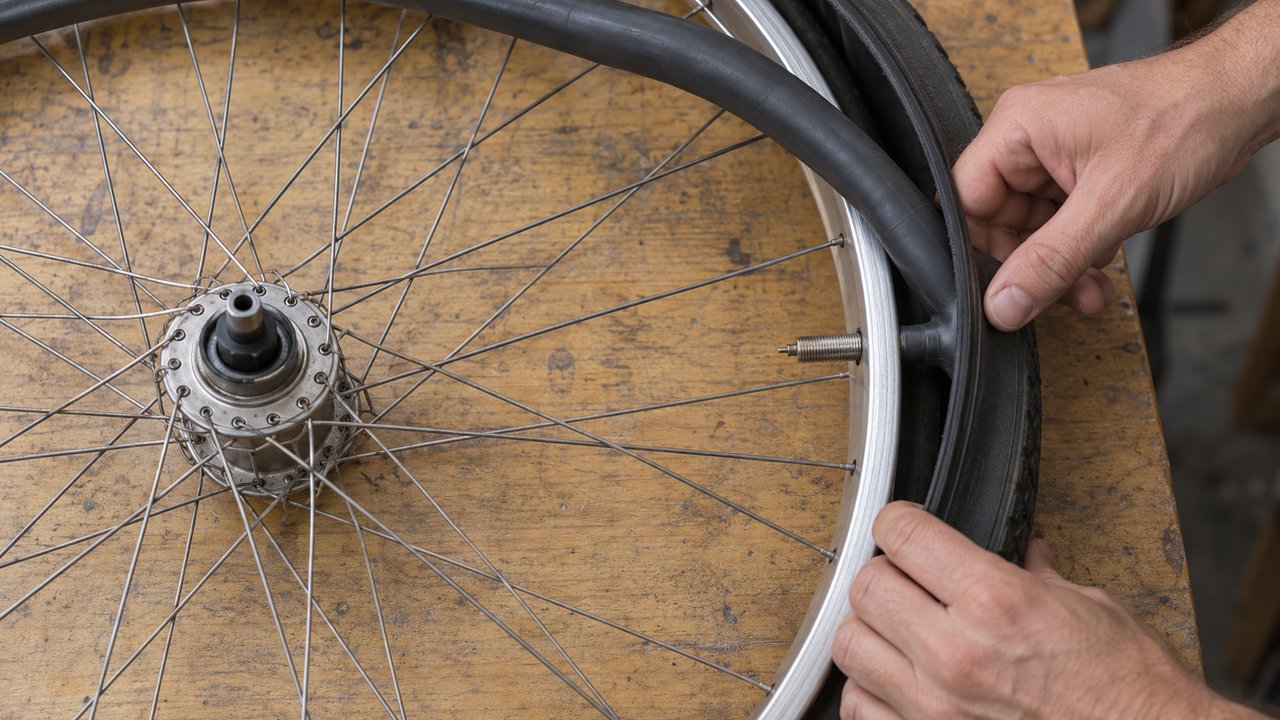
- Check the tire for a direction arrow on the sidewall and fit it to roll that way.
- Add just enough air for the tube to hold a round shape.
- Push the valve through the rim hole first, pointing straight at the hub; a crooked valve can cause a later flat. Line the valve up with the pressure label on the tire sidewall. The next puncture then lines up with its cause on the tire.
- Tuck the tube into the tire all the way around, then work the open bead onto the rim with your hands. Start opposite the valve and finish at the valve, the order Schwalbe recommends.
- For the last tight section, push the beads you’ve already fitted into the rim’s center channel all the way around. That slack lets you roll the final section over the rim wall with your palms.
- Push the valve up into the tire with your thumb, then pull it back down. Sheldon Brown uses this move to free tube trapped under the bead at the valve.
- Go around both sides and look into the gap between tire and rim. You should see tire, with no tube showing.
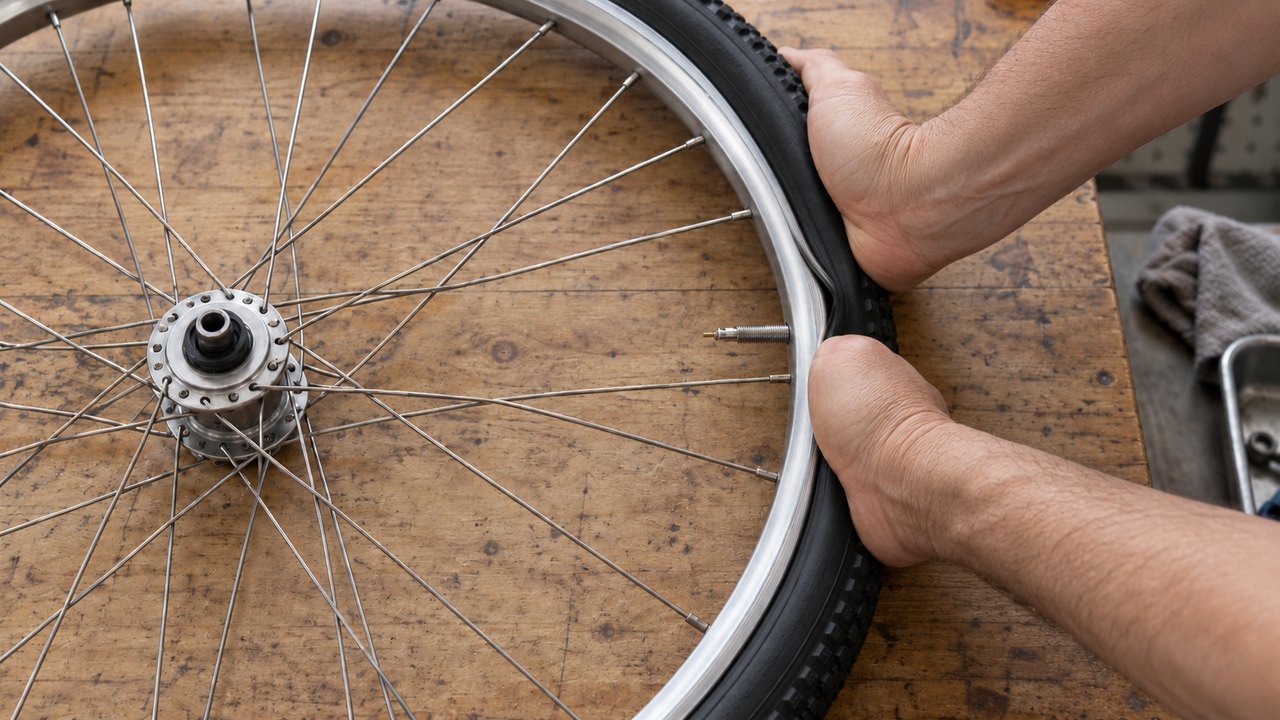
Talc on the tube is optional. Schwalbe says talc can cut friction between tire and tube, but talc that gets between the tire and the rim makes the tire slip more. If you use it, keep it on the tube.
If a lever is the only way to get the last section on, hook it under the bead with the tip pointing away from the tube and lift a small bite at a time. Schwalbe recommends small sections and more lever moves over one big pull.
Step 6: Inflate and check the bead
Inflate to low pressure first. Sheldon Brown suggests 20-30 psi. Then look at the thin molded line just above the rim on both sides of the tire. It should sit the same height above the rim all the way around.
- Line rises above its normal height in one spot: the tube is caught or the bead is riding up. Let the air out right away and reseat it.
- Line dips into the rim in one spot: the bead hasn’t popped up yet. More air often seats it, but don’t exceed the tire’s maximum. Soapy water on the bead helps; don’t use grease or oil.
Once the line runs even, pump to your riding pressure inside the range printed on the sidewall. Our bike tire pressure calculator gives a starting number from your weight and tire width. On a Presta valve, close the tip and tighten the rim locknut finger tight, not with pliers.
If the tube won’t take air at all, the problem is usually the pump head or the valve, not the patch. Our guide to fixes for a bike tire that won’t inflate covers both, CO2 included. If your floor pump only has a Schrader head, a Presta valve adapter lets it fill a Presta tube.
Refit the wheel. For a rear wheel, pull the derailleur back, set the smallest cog between the upper and lower runs of chain, and guide the rim between the brake pads. Seat the axle fully in the dropouts, close the brake release you opened, and spin the wheel to check that it runs straight and doesn’t rub. Squeeze the brakes once before you ride.
Tubeless tire flat: plug it
Schwalbe says its tubeless sealant seals punctures while you ride, but not large cuts or snakebites. When the hole is too big for the sealant, a plug fills it. The steps from Park Tool’s TPT-1 plug tool sheet:
- Find the puncture and remove the object if it’s still there.
- Push the tool’s ridged fork back and forth through the hole to clean it out.
- Thread one plug halfway through the fork.
- Push the tool into the hole until about 6 mm (0.25 in) of the plug ends still show.
- Hold the retainer against the tire and pull the tool out, leaving the plug in.
- Reinflate to test. A big hole may need a second plug.
Park Tool calls a plug a temporary repair and says to replace the tire as soon as possible. Stick-on patches don’t work on tubeless tires; only UST or other butyl-lined tubeless tires can potentially take a vulcanizing patch, per Park Tool’s tubeless guide. If the plug won’t hold, Schwalbe’s fix is a spare tube: remove the tubeless valve and wipe the sealant out of the tire first.
What to carry for a flat
Pack a kit that matches the steps above. The links go to Amazon, and Icebike earns a commission on purchases through them. We chose each item for a feature this guide uses, not from a hands-on test.
- Tire levers: Park Tool TL-1.2 tire lever set. Three plastic levers with spoke hooks, for the two-lever method in Step 2.
- Glueless patches for the road: Park Tool GP-2 Super Patch kits. The glueless kit in the patch table; fits butyl and TPU tubes.
- Vulcanizing patches for home: Park Tool VP-1 vulcanizing patch kit. The glue kit in Step 4; fits butyl and latex tubes.
- Tire boot: Park Tool TB-2 emergency tire boot, for a cut casing.
- Mini pump with gauge: Topeak Road Morph G. An in-line gauge so you can hit the sidewall range at the roadside, and a head that fits Presta, Schrader and Dunlop valves.
- Spare tube: one in your tire’s size and valve type. Buy it to match the sidewall, not a generic size.
Quick answers
Should I patch or replace a bike tube?
Replace it at the roadside and patch it later. A spare tube goes in faster, and a vulcanized patch done at home is a lasting repair. Glueless patches are a get-home fix: replace a tube with a GP-2 patch as soon as possible. Bin tubes with valve-base tears or long tears, since no patch covers them.
Why did my new tube go flat right away?
Something is still in the tire, the tube got pinched during fitting, or the rim tape left a spoke hole uncovered. Check the hole position on the new tube: tread side points to the tire, rim side to the rim tape, two slits to a pinch. Run your fingers around the casing again before tube number three goes in.
Can you fix a flat bike tire without tire levers?
On many tires, yes. Deflate it fully, push both beads into the rim’s center channel, then roll a section of bead over the rim wall with your thumbs and work around. Tight tire-and-rim pairs need levers. Use plastic ones; Schwalbe says not to use metal levers, and a screwdriver can cut the tube or scar the rim.
Can I ride on a patched tube?
Yes, at your normal pressure, once every edge of the patch has bonded. Park Tool rates the vulcanizing patch as a permanent repair and the glueless GP-2 as temporary, so swap a glueless-patched tube when you get home. Check the patch edges whenever you have the tire off.
Sources
- Park Tool, Tire and Tube Removal and Installation
- Park Tool, Wheel Removal and Installation
- Park Tool, How to Patch a Tire and Tube
- Park Tool, VP-1 Vulcanizing Patch Kit instructions and GP-2 Super Patch instructions
- Park Tool specification pages (tube compatibility): VP-1 Vulcanizing Patch Kit and GP-2 Super Patch Kit
- Park Tool, TPT-1 Tubeless Tire Plug Tool instructions and Tubeless Tire Removal and Installation
- Park Tool videos: How to Remove and Install a Bicycle Tire & Tube and How to Patch a Bicycle Inner Tube
- Schwalbe, Tire mounting
- Schwalbe, Tech Info (valve tear-off and talc, p. 31; tubeless punctures and fitting a spare tube, p. 43)
- Schwalbe, Aerothan Tube (glueless repair, 4 mm two-patch rule) and Accessories (glueless patches not for butyl tubes)
- Sheldon Brown, Flat Tires